
DIY Mermaid Moleskine Sketchbook + Giveaway
Some links in this post are affiliate links to products I love!
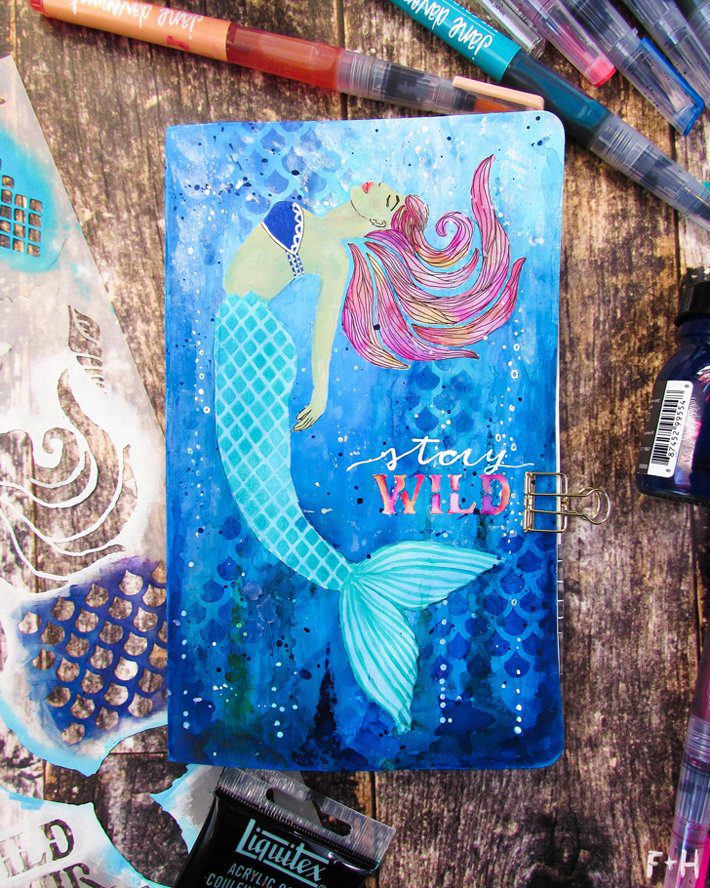

In this tutorial, I’m sharing how to make this super gorgeous mermaid cover on your Moleskine sketchbook! I’m using these amazing mermaid stencils just released from StencilGirl! It was so fun to play around with them and create some salty sea-inspired works. So, let’s onto this mermaid Moleskine notebook!
Supplies Used:
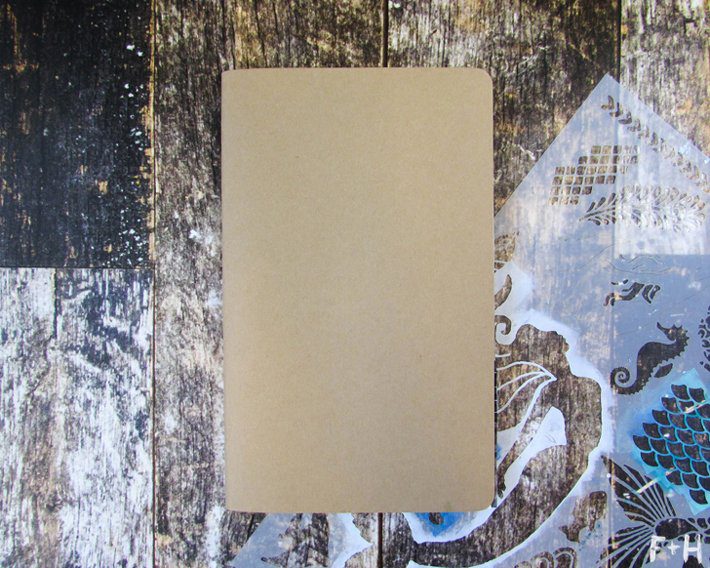
- Moleskine Cahier Journal, Large Plain
- Liquitex Professional Gesso
- Liquitex Basics Acrylic:
- Liquitex Professional Soft Body in Pthalo Blue
- Liquitex Heavy Body Acrylic: Prussian Blue
- Pebeo Studio Acrylic Iridescent Blue Green
- Liquitex Acrylic Ink in Muted Turquoise
- Winsor & Newton Galeria Acrylic in Buff Titanium
- Micron .01 Fine Marker in Sepia
- Liquitex Matte Medium
- Prismacolor Matte Fixative Spray
- Jane Davenport Mixed Media Mermaid Markers
- StencilGirl Mermaids Stencil and Masks
- Posca Paint Markers – Medium Tip
- Uniball Signo Broad White
- DecoArts Media Soft Touch Varnish
- Paint brushes
- Cosmetic sponges
- Heat Gun
Step One
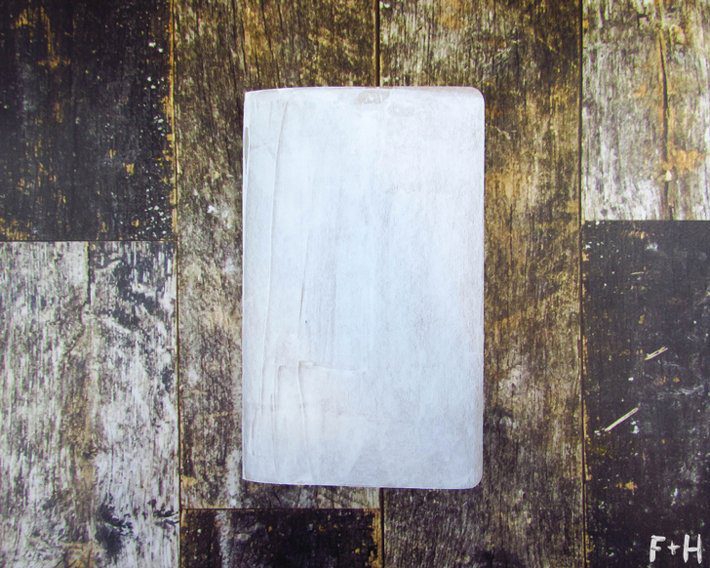
First, apply a thin coat of gesso over the front of your Moleskine notebook. I used a credit card to scrape the paint over mine so it was covered evenly, but still a thin layer. Let dry, or use a heat tool like me because waiting for paint to dry is booooring!
Step Two
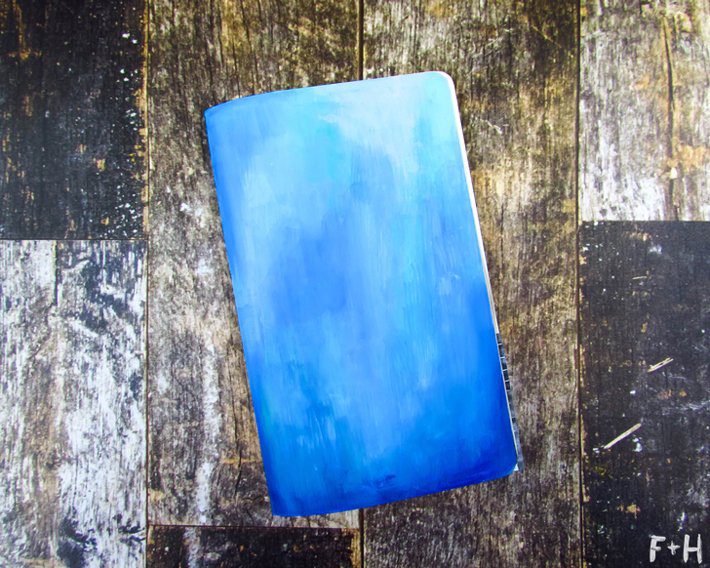
Next, use the myriad of blue acrylics listed to create an ocean background. Focus the darker blues (like pthalo and Prussian) near the bottom and the lighter blues (like light permanent blue and bright aqua green) near the top, to mimic the effect of sunlight coming through the water. Let dry or use heat tool!
Step Three
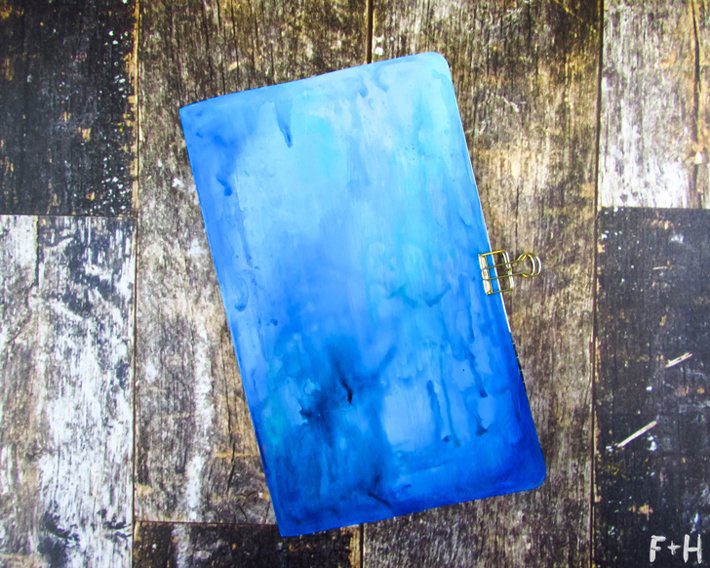
This is where things get fun! Using the Mermaid Markers, play with them like watercolours to create a watery appearance. I used the Deep Sea, Bluebottle and Byron Bay markers and the acrylic ink in Muted Turquoise. The key here is to use a good amount of water to move the inks around the page and create a water stain effect. Dry with your heat tool. Then take outside and spray with the fixative. This is SUPER IMPORTANT as it will seal in the water-soluble inks. If you don’t do this step, you’ll end up smearing these layers in future steps. Spray & hit that journal with a heat tool!
Step Four
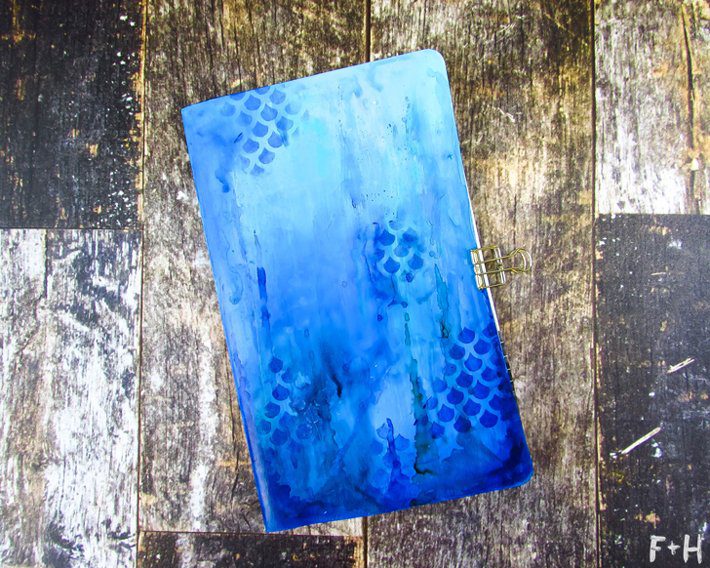
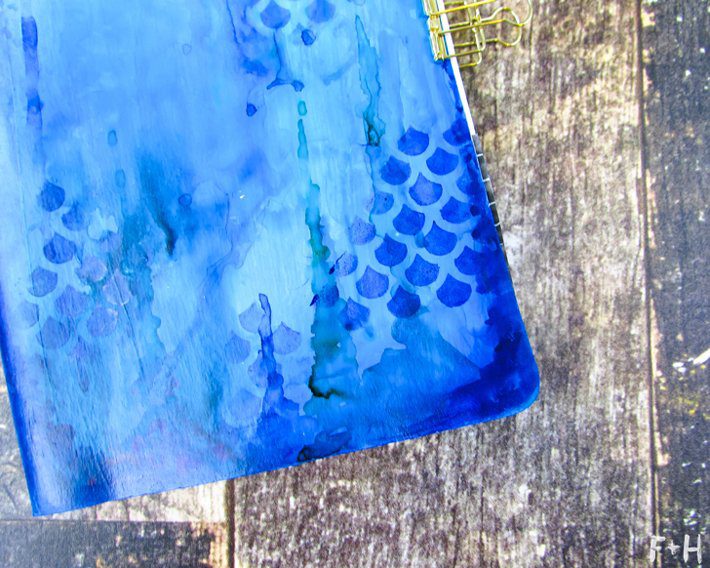
Cover the journal with a thin coat of matte medium and let dry. Next, grab your StencilGirl mermaid stencil and create some texture with the scales pattern in random places. You will want to use blues so they don’t stand out too much from the background. Dry with the heat tool.
Next, use the mermaid markers again to create the underwater “coral” on the bottom of the journal. I used Deep Sea, Byron Bay and Siren first lightly in the shape I wanted, then went over the top with a water brush to create the shape of the coral. Seal this layer again with the spray fixative to ensure that your watery landscape doesn’t move.
Step Five
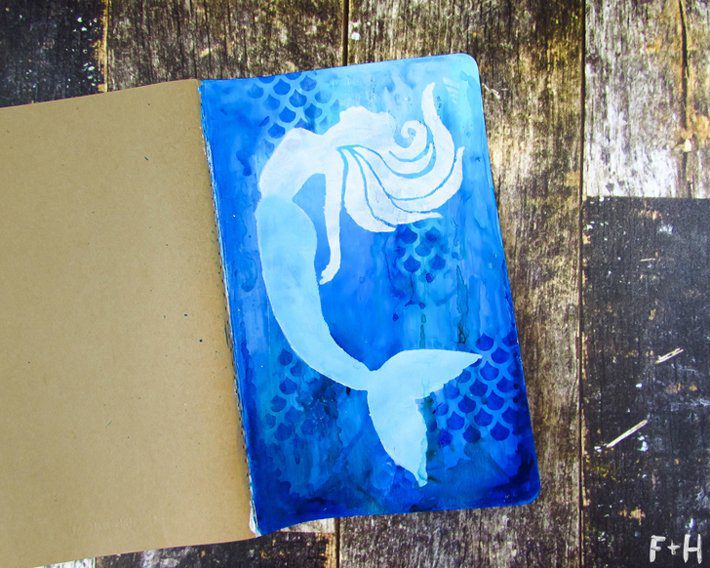
Next, using a cosmetic sponge and the mermaid stencil, stencil on this beautiful mermaid! Use white gesso on the entire shape, and then go back over the tail with a little bit of bright aqua green mixed in.
Step Six
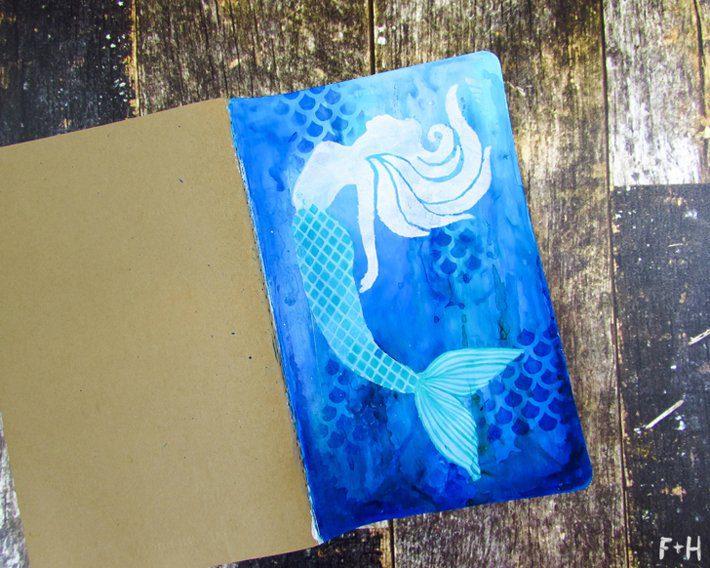
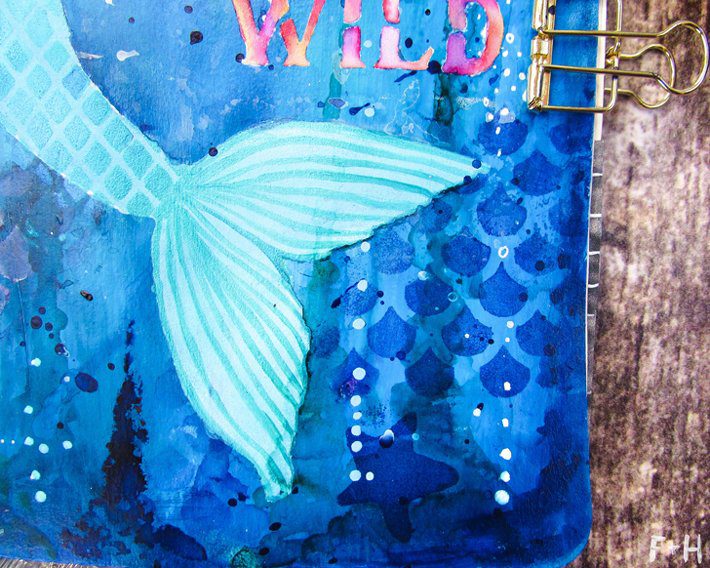
Next, stencil over the tail with a scale pattern using Pebeo Studio Acrylic Iridescent Blue Green. For the tail fins, you can water down some of the acrylics and use a fine liner brush to create the lines.
Step Seven
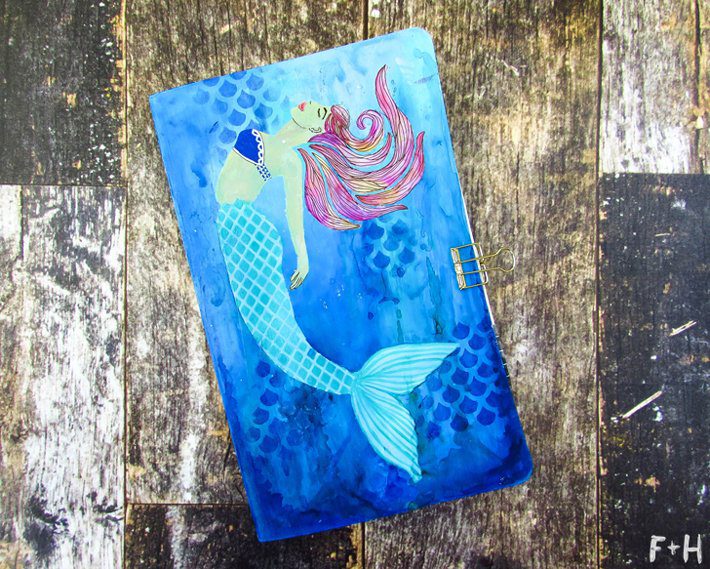
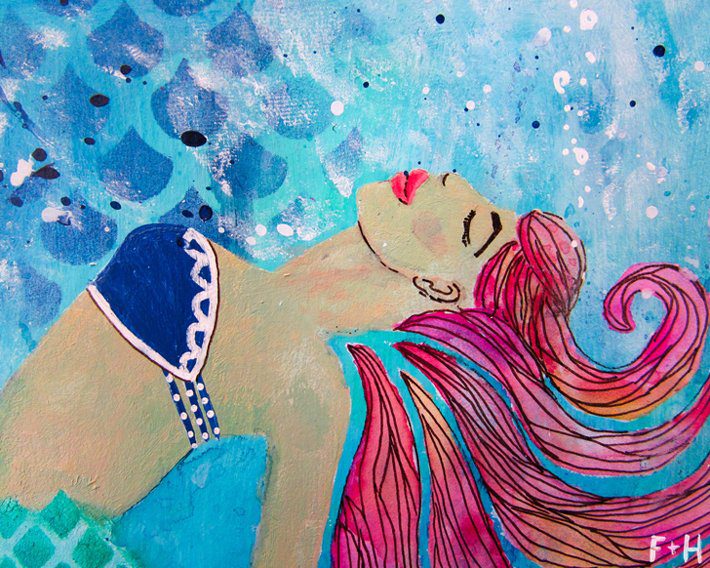
Next: that hair! You’ll use the Mermaid Markers again (I seriously love these things!) to create her wonderful watery coral inspired hair. I used Starfish, Coral, Lobster and Beach, and a water brush to help blend all the colours. First, put down a little bit of ink and then use the water brush to spread it around and blend with the other colours.
Step Eight
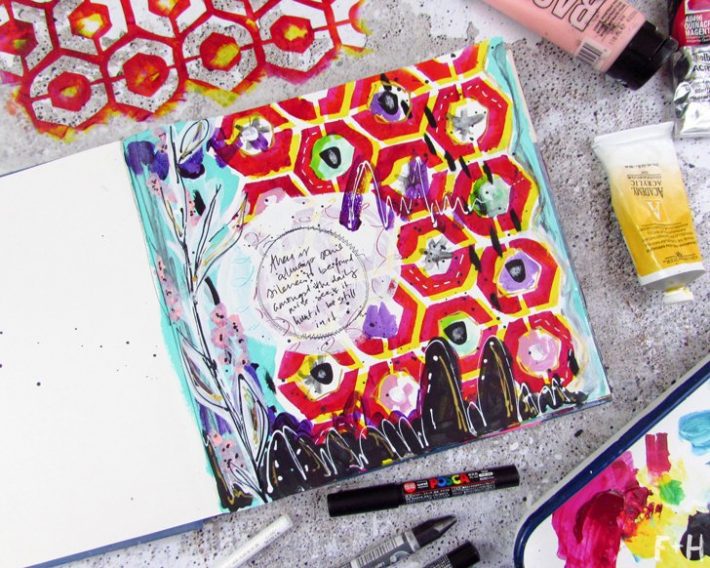
And now for some more details!
First, you will want to paint your mermaid’s skin whatever tone you like. I used Buff Titanium mixed with a bit of bright aqua green and portrait pink to give her a green hue to her skin. She is a mermaid underwater after all!
Next, I gave her a top with some paint and used a Posca paint marker for the details. Cute, right? I wish I had it in my size!
Finally, I used the Micron .01 pen to add in the lovely details in her hair and face!
Step Nine
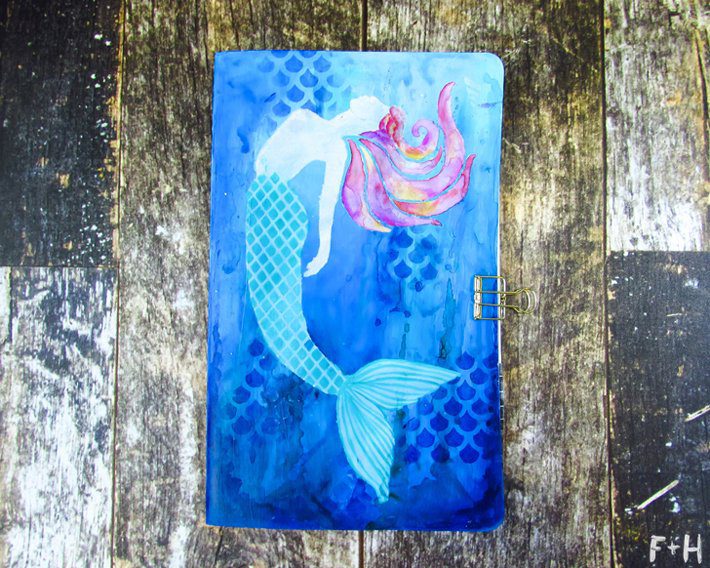
 Add in even more details! Use the white paint and Prussian Blue to create paint splatters on the background, and stencil on a couple starfish. I forgot to take a separate picture of the next bits, but use the white gel pen and paint markers to create “bubbles” in the background as well. You’ll see these better in the next photo! I also outlined my mermaid with a Stabilo All Pencil in Blue and Black to help her stand out a little more.
Step Ten
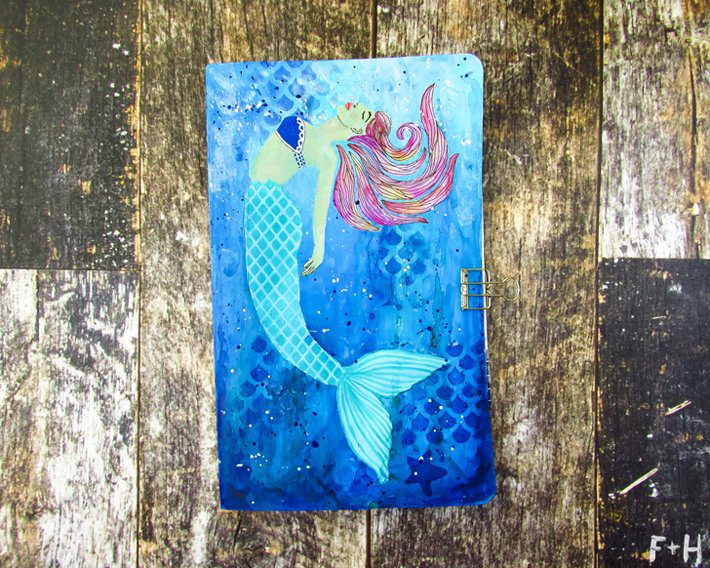
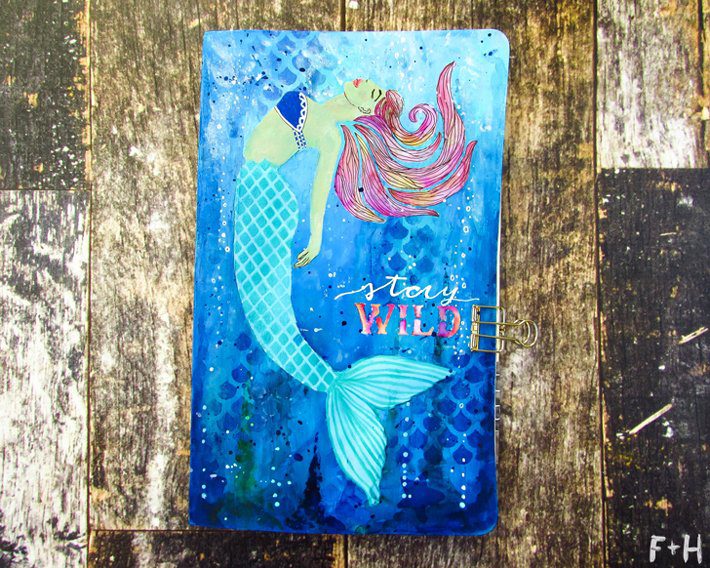 Lastly, use the mermaid stencil to stencil on the word WILD. Then use the white gel pen to write stay above it to add the inscription “Stay Wild.” You can leave it white, or use the same technique on the word “wild” as I did on the mermaid’s hair to make it really pop. Seal the whole thing with some soft touch varnish and you’re done!!
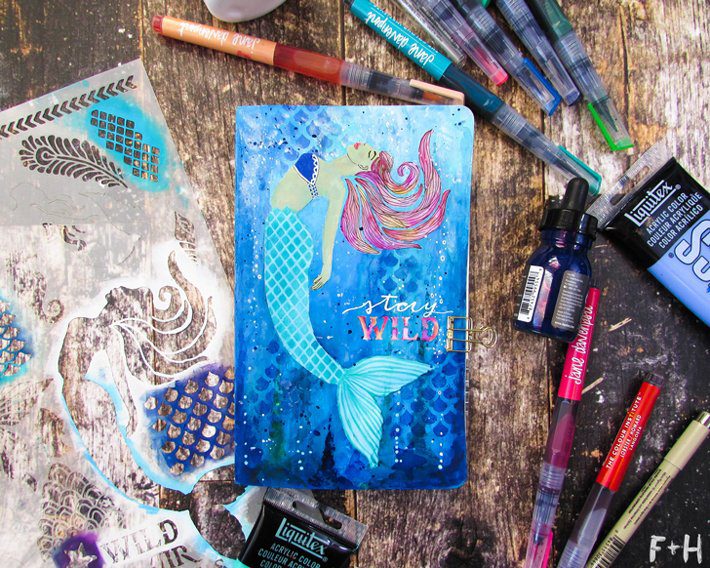
PHEW! Did you make it to the end?! This tutorial was one of my longer ones, but this Moleskine notebook is so cute and has me dreaming of days at the beach. If you’ve made it to the end, then you definitely need to enter the giveaway to win your very own mermaid stencil from StencilGirl!
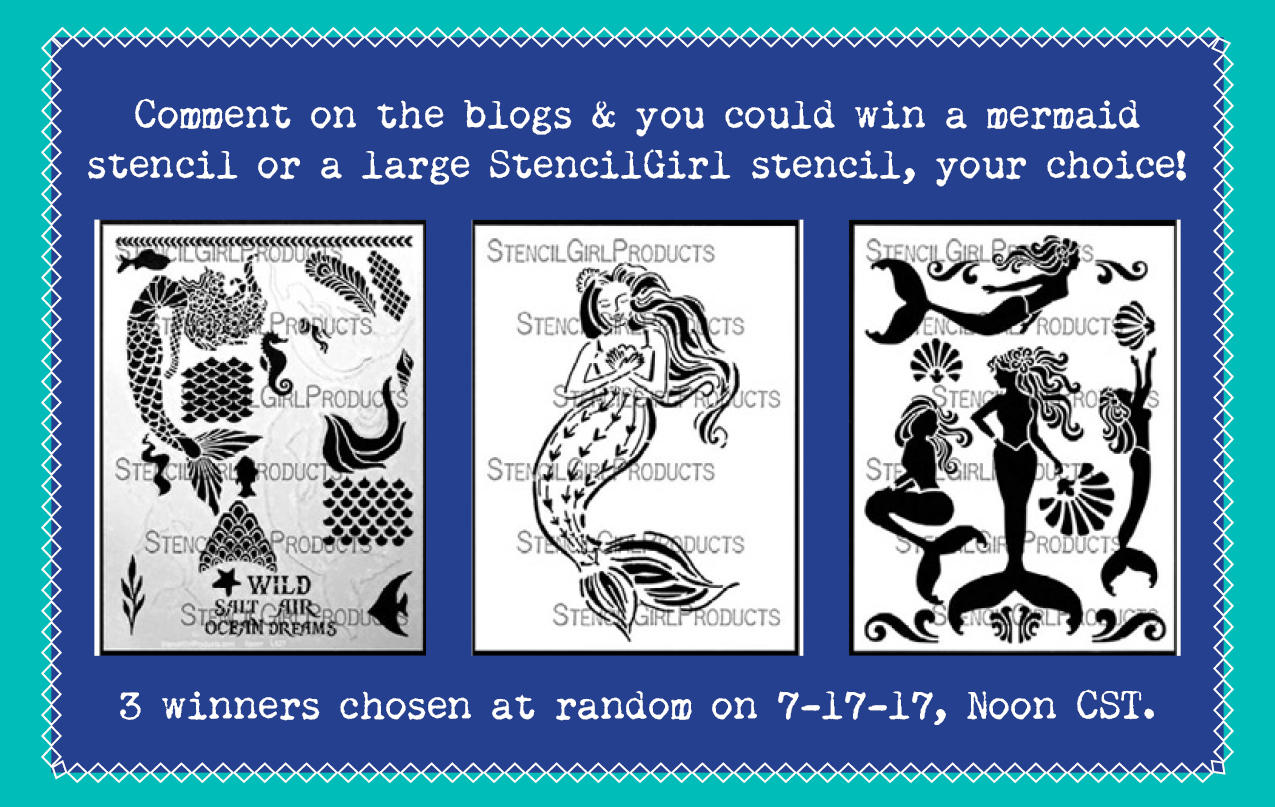
Comment on this blog or any of the others below by noon CST on 7-16-17. Winners notified by email on July 17th. Good luck!
- Sandee Setliff
- Art &Whimsy
- Canino’s Artistic Cafe
- Junque Art
- Kiala Givehand
- Carol Baxter
- Janet Joehlin
You can find even more mermaid projects by the rest of the StencilGirl Creative Team over on StencilGirl Talk, and you can check out these original mermaid projects from the stencil designer Jessica Sporn!


5 Comments
Anya
July 14, 2017 at 12:30 am
Thank you for this fabulous tutorial on creating a mermaid journal page! She's beautiful!! Love these mermaid stencils!
hsmom3
July 13, 2017 at 10:09 pm
Absolutely gorgeous, Torrie 😍
Monica Garcia
July 13, 2017 at 9:38 pm
I also love to decorate my Moleskine notebooks! This is do beautiful, thanks for a great tutorial! garciacoach (at)gmail (dot) com
Kimberlye Richardson
July 13, 2017 at 6:13 pm
Oh my goodness! This is truly an image that speaks to my heart, along with the phrase "Stay Wild". I loved seeing each step and how the full beauty unfolded through each layer. I agree that a heat gun keeps things from getting "boring" as you're waiting for things to dry. The hair, the word WILD and even that top are amazing. I loved seeing the zoomed in detail of everything. She is a beautifully wild mermaid. The hair flung back, the color… she is everything I'd imagine a mermaid to be. Thank toy for sharing all of your process and this beautiful cover. I need to find a sealant now and get those mermaids and markers everyone is using. They are amazing. I am so I love with this series. As a Pisces, I cannot help but love every one… but your colors are magical! Thank you so much for a truly wild and inspiring piece!! 😘❤❤ ( boley_1 (at) yahoo dot com)
Janis Graham
July 13, 2017 at 5:10 pm
I love this and that you used the JD Mermaid Markers! Janisugraham@yahoo.com