
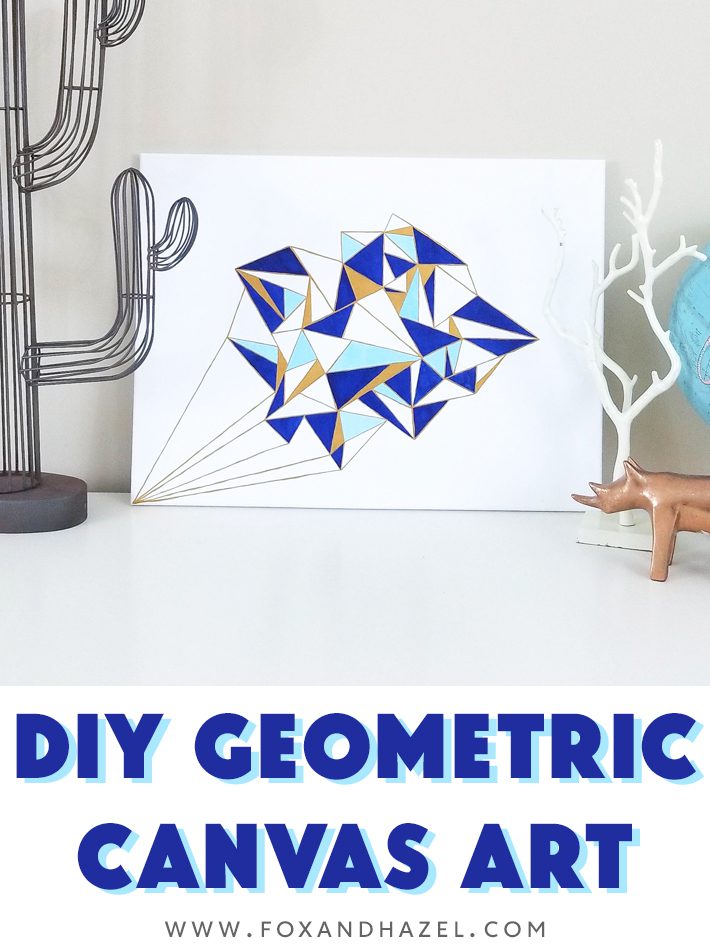
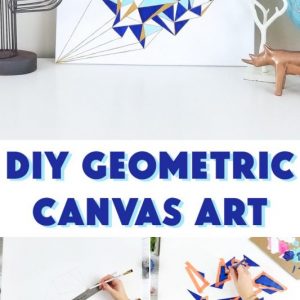
Geometric Canvas Art DIY
Some links in this post are affiliate links to products I love!
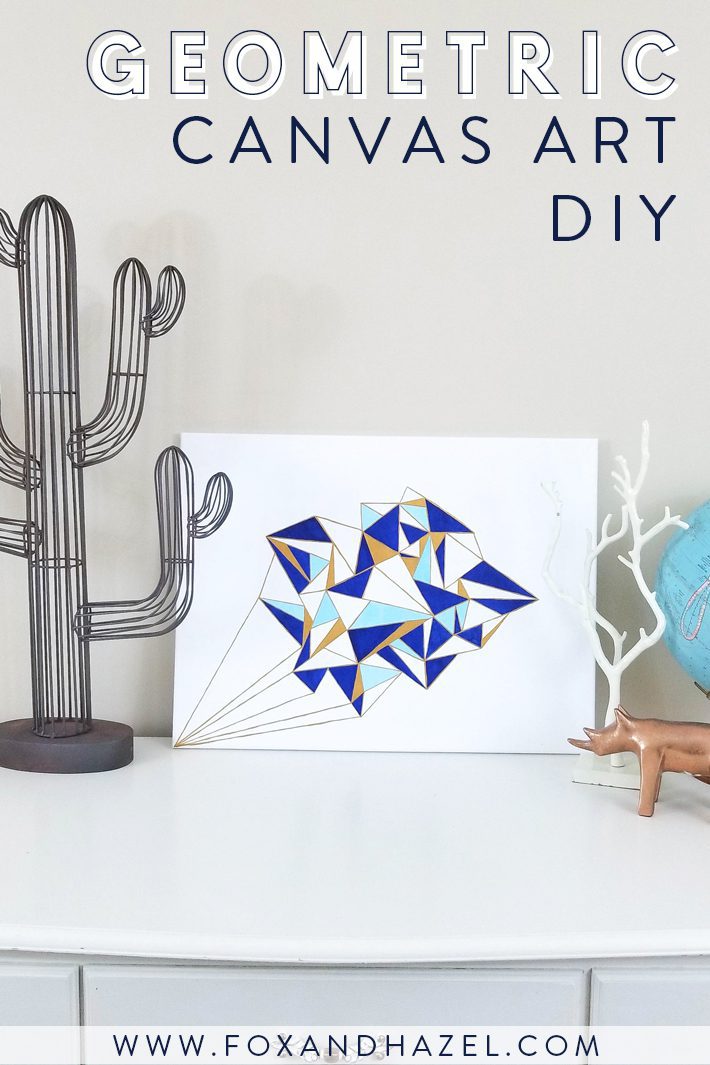
I don’t know if geometric art is still in (is it ever out?!) but I am 100% still in love with it. My personal style fluctuates a lot between soft, organic shapes (flowers, leaves, etc) and really geometric, graphic elements (sharp shapes, black, lines, etc.) A good modern geometric design is just as appealing as a feminine floral one. It’s just how I roll! So this geometric canvas art DIY was born out of my love for all things triangle, angular, and gold. This painting had been brewing in my mind for months and I finally got it done.
So, let’s get right into making this geometric canvas art DIY!
Supplies for your Geometric Canvas Art DIY:
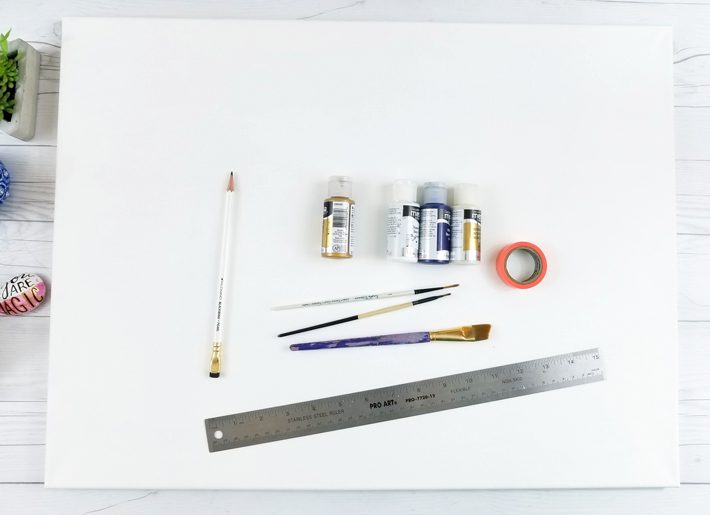
- 18″ x 24″ wrapped canvas
- white gesso
- Deco Art Media Fluid Acrylics in:
- washi tape or thin painter’s tape
- flat brush
- liner brush
- high gloss acrylic varnish
- pencil
- 15″ ruler
Step One:
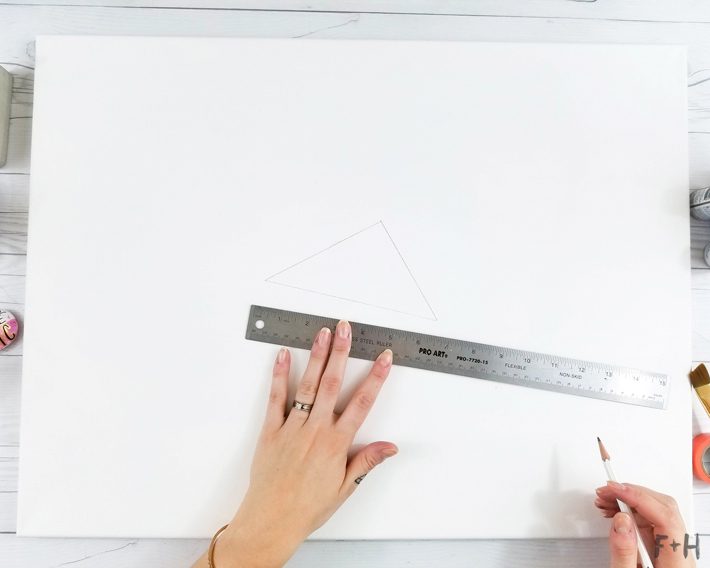
**Note: I prepped my canvas with a coat of gesso, but failed to snap a pic. I recommend this as the primer on the bought canvases can pick up direct really easy as is not as white**
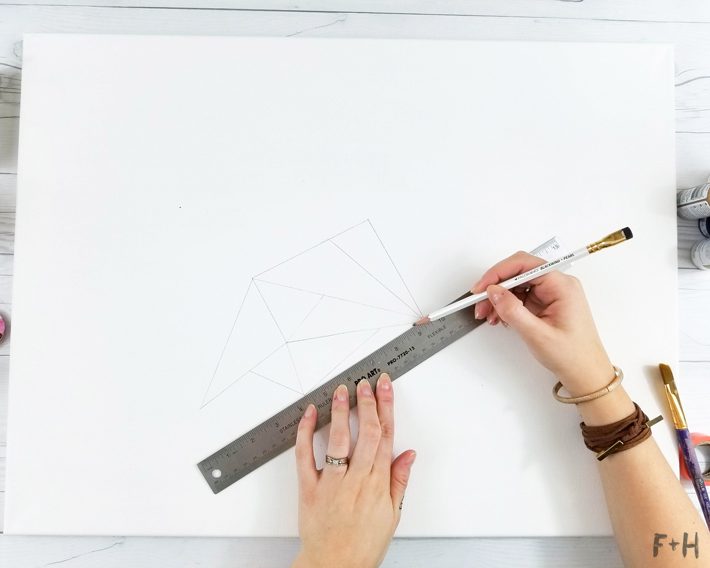
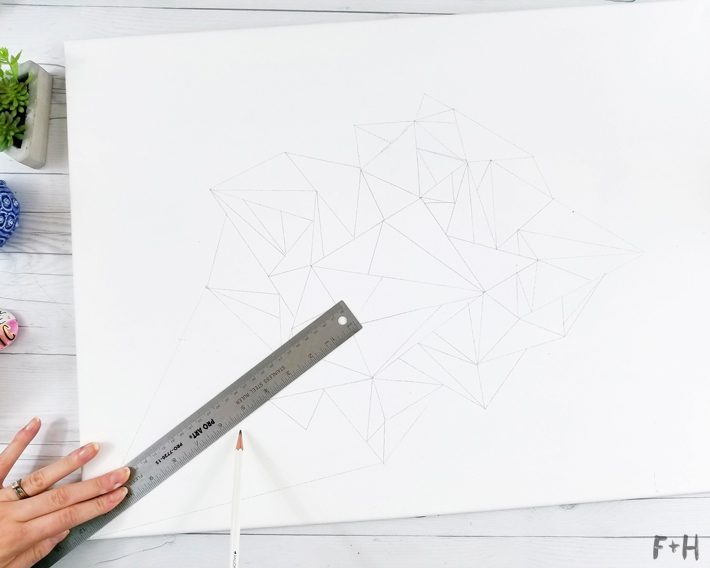
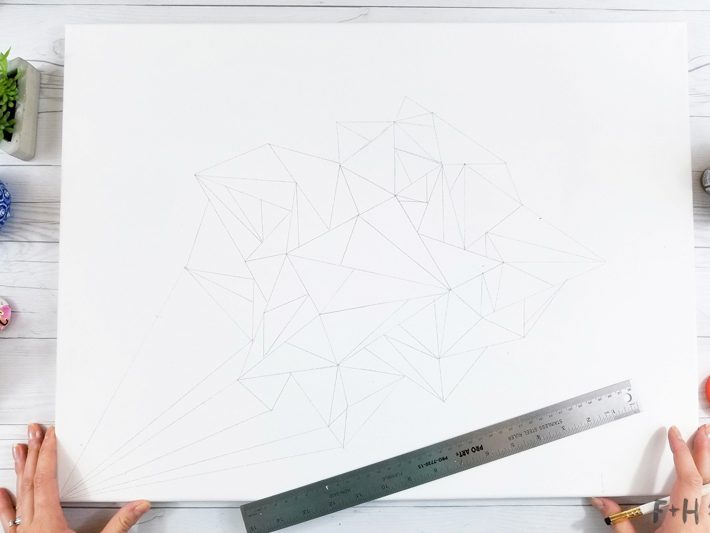
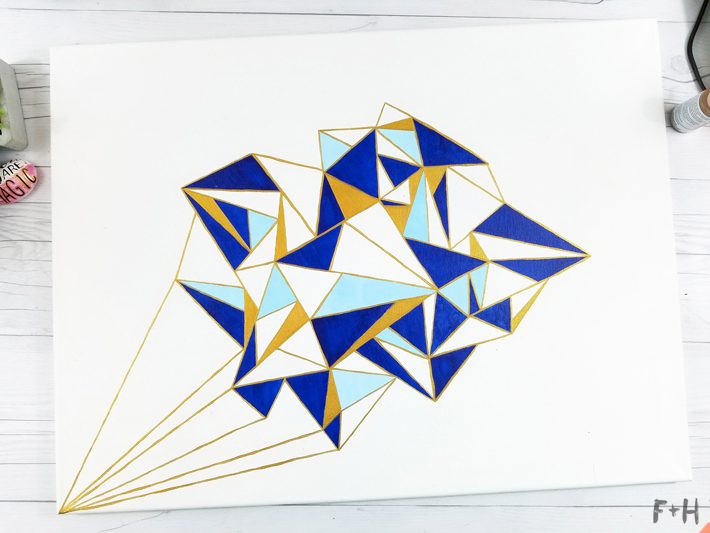
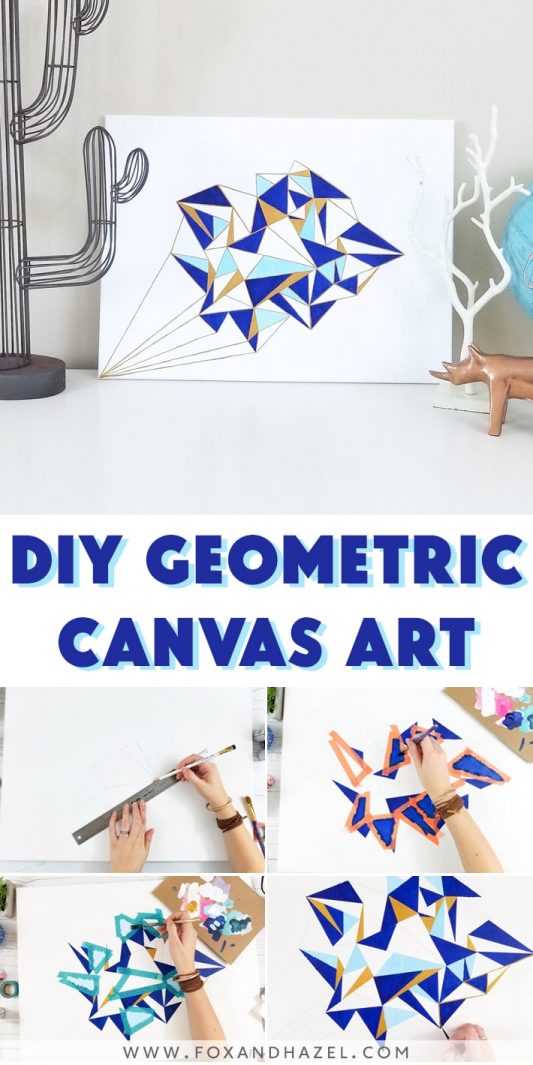
Before we get to painting this hella cool geometric canvas art DIY, we need to plan out all our triangles. There is not a whole lot of technique to this! First, draw a triangle roughly in the centre of your canvas. Then working your way around the canvas, you’ll keep drawing triangles of different sizes and shapes. Try to vary them as much as you can and to have the points of triangles meet, and then others butt up against each other unexpectedly. The more random it is, the better the final piece will look. I’ve chosen to create an irregular border to my shape, so that it’s sort of sharp and angular.
You can do this, or draw your triangles so that it creates a smoother outer edge. Once you have the shape you’re happy with, decide which corner you want to anchor the shape to. I’ve chosen the left for my painting. What you’ll do is choose the anchor point in the corner, and draw a line from the corner to any points on the bottom corner of your shape. You can see below that all my anchor lines are meeting where smaller triangles also meet in a corner.
Step Two:
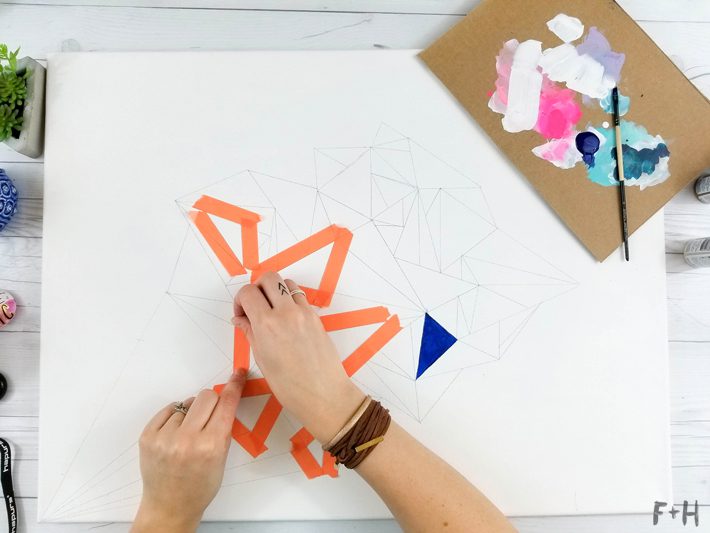
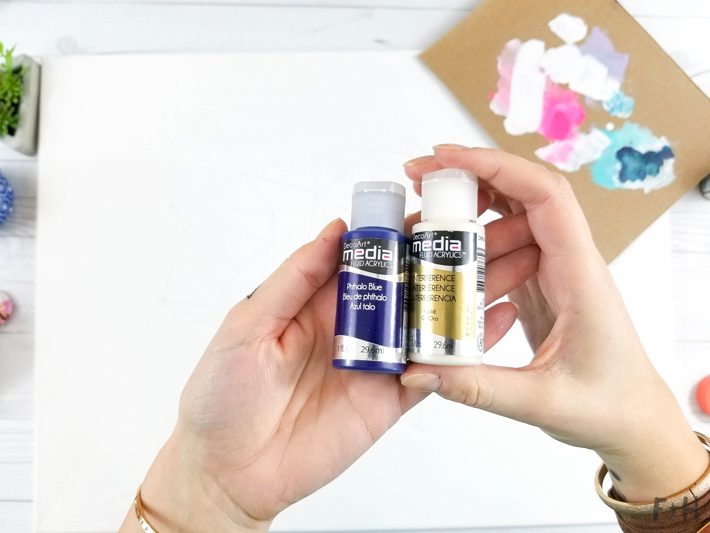
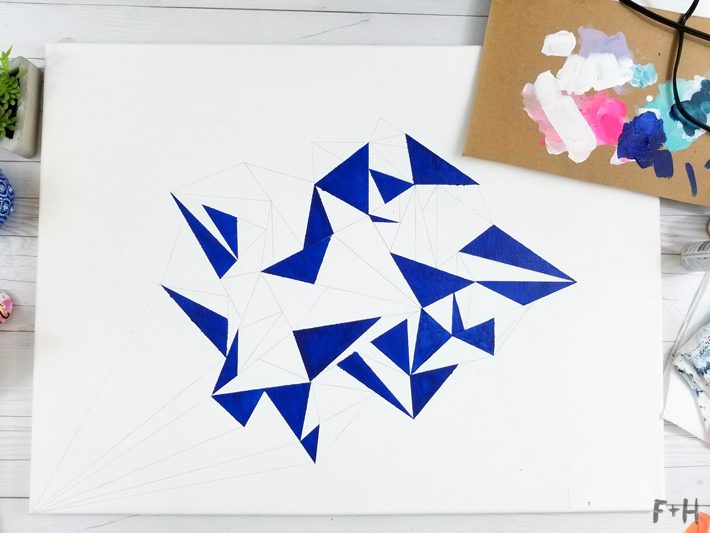
Now, you can start to tape off some of the triangles for the first color, the phthalo blue. It’s okay if you don’t get all the triangles you want at first, because we will be doing this repeatedly throughout. Once you have all the triangles taped off, apply a coat of the Deco Art Media fluid acrylic in Phthalo Blue in an even layer. Work from the tape towards the center of your triangles so there is minimal bleeding under the tape. Let the first coat dry or use a heat gun to speed it up. Apply a second coat of paint and let dry. You can add as many coats as you like, but two was enough for me! Remove the tape and ta-da! The first set of triangles! **Optional: you can apply a coat or two of the Interference Gold paint on top of the blue for some extra pizzazz**
Step Three:
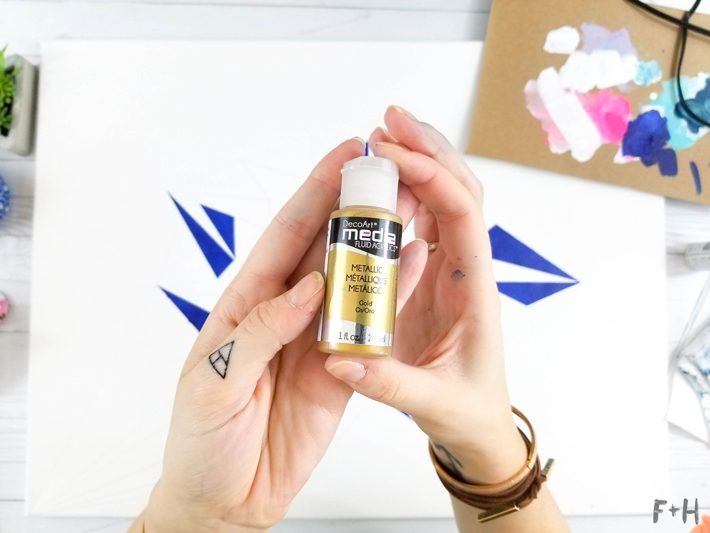
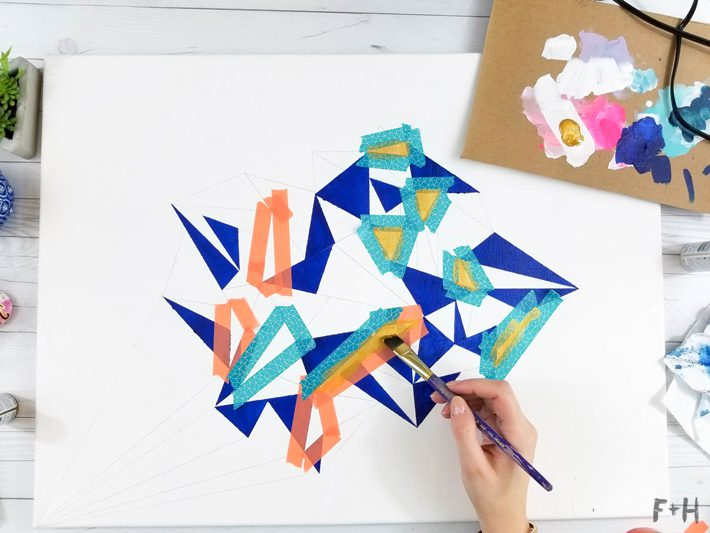
Repeat the tape & paint method with more triangles, this time using the Deco Art Media gold fluid acrylic. I chose a lot of the smaller triangles for the gold because I wanted it to be an accent color, since we will be outlining everything in gold.
Step Four:
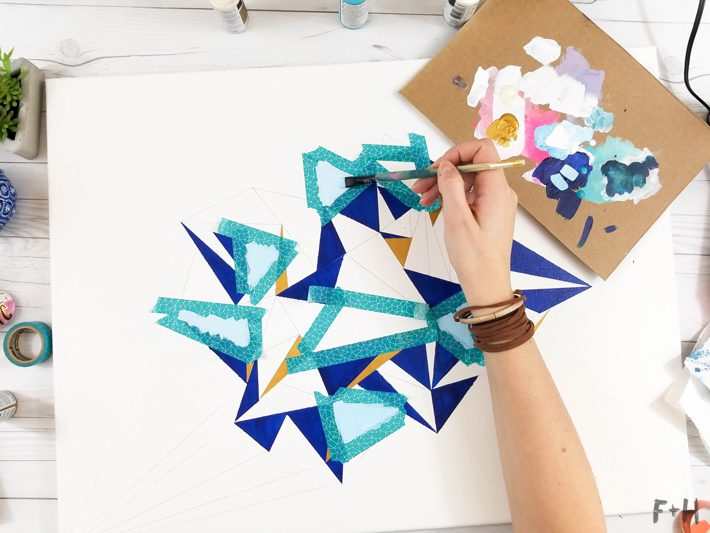
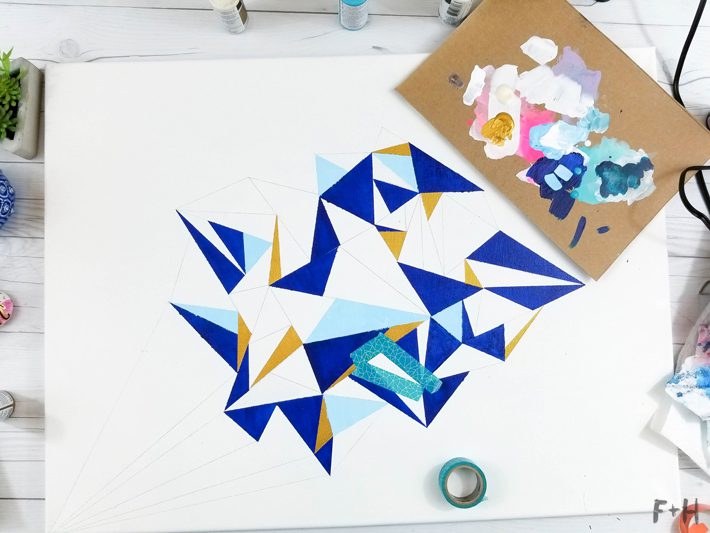
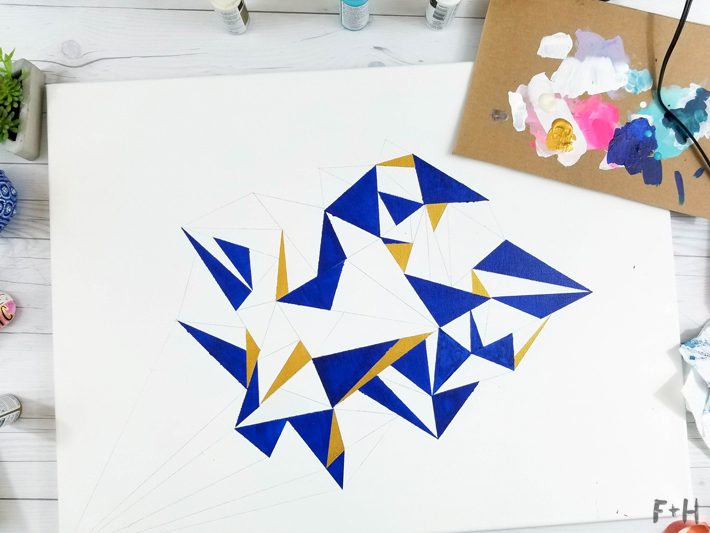
Next, mix some Deco Art Media Fluid Acrylic in Titanium White with a bit of the phthalo blue to create a light blue shade. Repeat the tape & paint method once again. There’s a lot of taping & painting, but it pays off in the end! Once you’ve done all three colors, you can go back and fill in any more triangles that you want with more paint. I went back and did some more because I felt like there was still too much white showing.

Step Five:
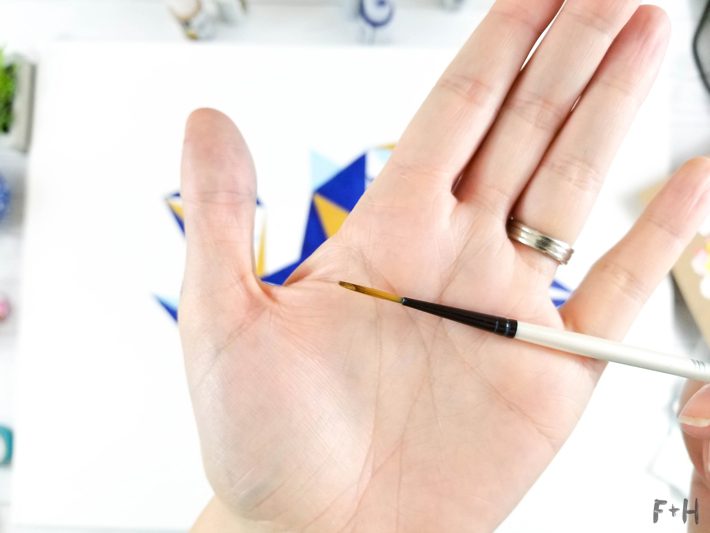
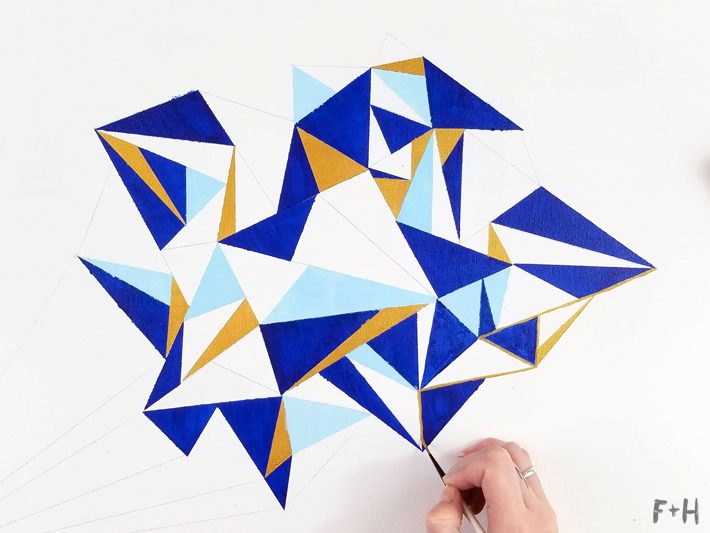
Now, on to lining! You will need a liner brush for this because it is the best tool for painting consistently even paint lines. Using your brush and the Deco Art Media fluid acrlyic in gold, outline all of the triangles in your large shape. This is going to take a while, and this is your chance to cover up any paint tape bleeds that happened! I suggest listening to an audiobook or podcast while you truck through this part – it’s a bit tedious. But so worth it in the end! Also be sure to paint over your anchor lines in the bottom corner as well. Let this dry completely.
Step Six:
Once all the paint is dry, coat the entire painting with a gloss varnish to seal & protect all your hard work! You did it – you finished this long geometric canvas art DIY. I’m proud of you!
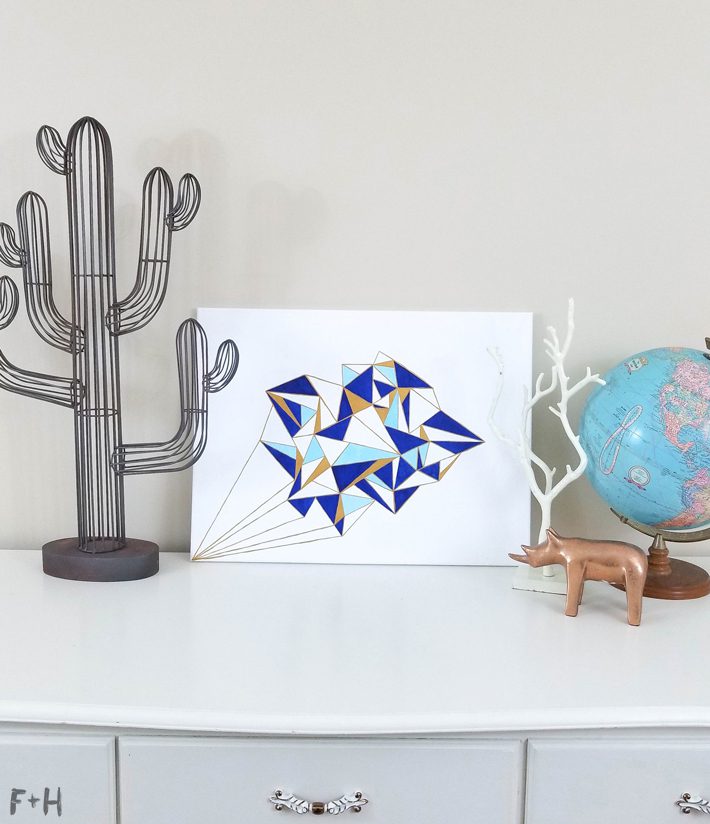
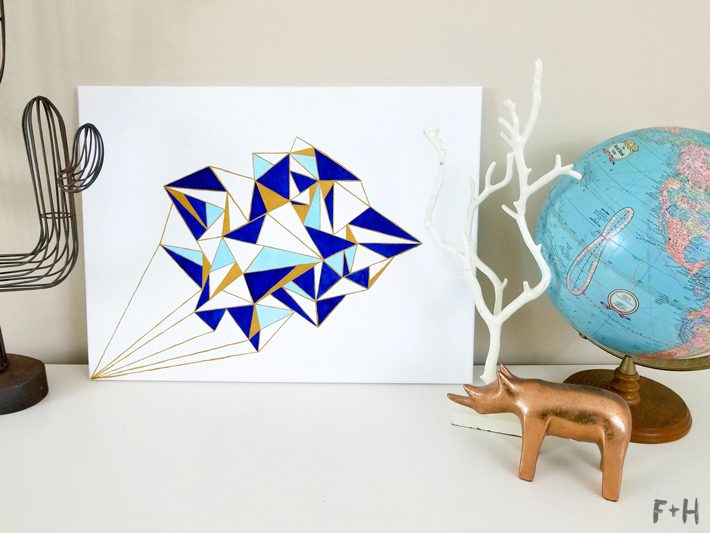
I absolutely love how this painting turned out! I plan to hang it in my son’s room, and hopefully, someday he’ll appreciate it. Creating art that makes a statement doesn’t have to be hard as long as you have a few supplies and some time!


4 Comments
40 Acrylic Painting Ideas For Beginners – ENTIBUZZ
July 20, 2022 at 12:54 am
[…] Source: foxandhazel.com […]
Easy acrylic painting ideas: 25 acrylic painting ideas and inspiration – Bingxo
October 26, 2021 at 8:30 am
[…] paint. Add metallic paint to your cancas for a more elegant finish. Learn how to make your own geometric wall art with Fox + […]
ariel
February 26, 2018 at 1:52 pm
Cute! Love the colours you chose.
torrielynn
February 26, 2018 at 9:39 pm
Thanks Ariel! 🙂