Some links in this post are affiliate links to products I love!
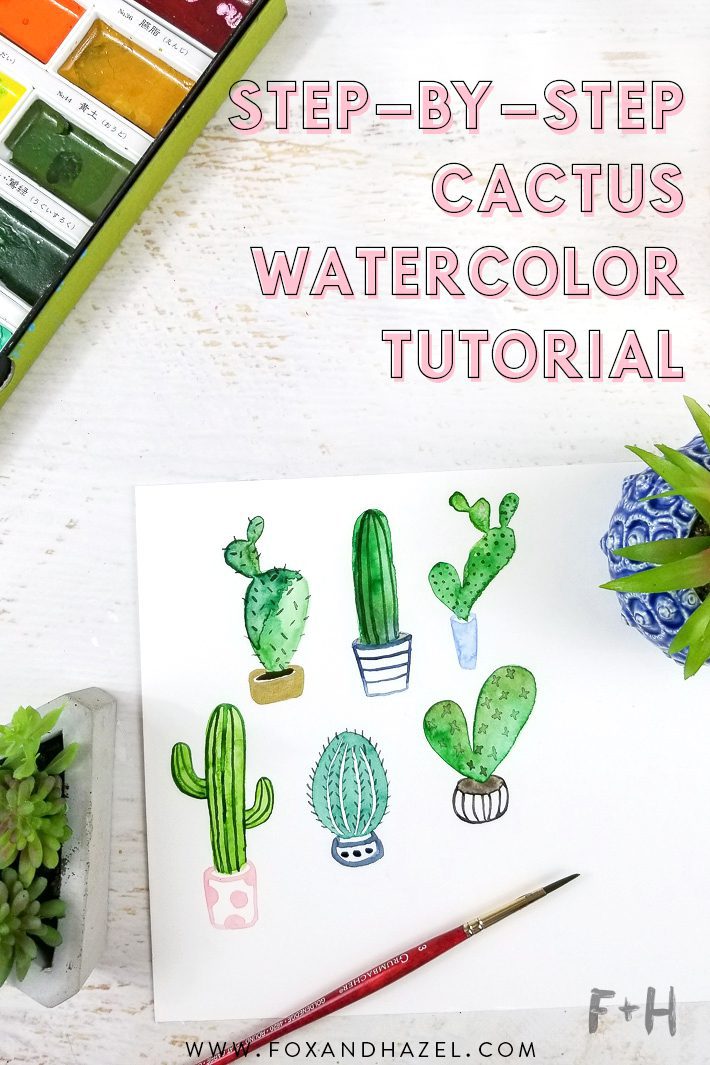
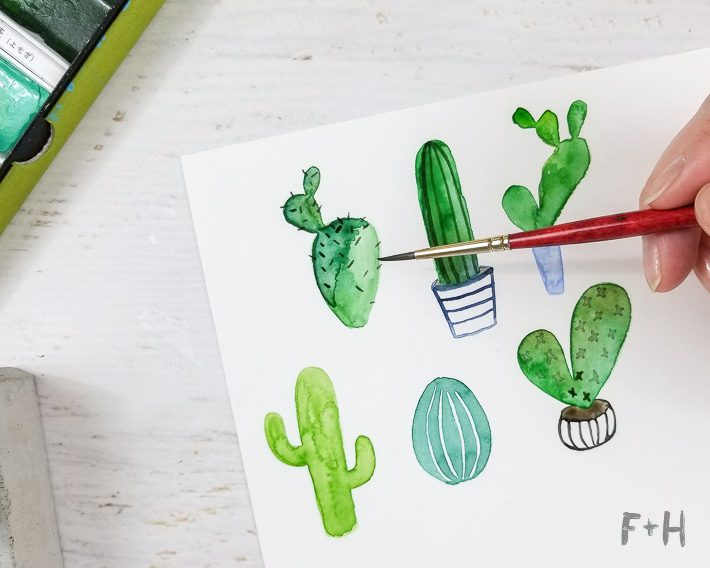
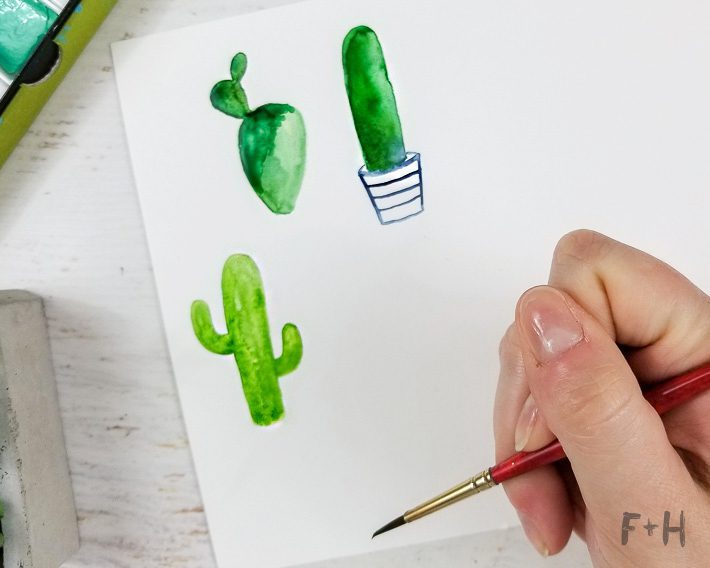
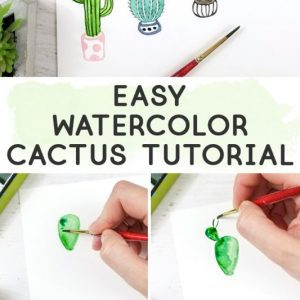
Are you ready to start painting a watercolor cactus?! I know I am! These sweet little watercolor cacti are a breeze to paint, and I’m going to show you how to paint all 6. You just need a couple of supplies and some time to practice! Fair warning: There are a LOT of photos in here and this is a beast of a post. But I wanted to share as many photos as possible of each step. I didn’t want to glaze over anything and leave you wondering what I did. So, bookmark this bad boy to come back to if you need to!
Before we get started, I want to make a note that the photos seem out of order, but if you read the instructions, the steps are in the correct order. I painted these in a different order than I’m sharing here because I batch-painted the shapes, then added the details in. I just wanted to clarify that because the photos seem out of order at first glance. Be sure to read each set of instructions for each watercolor cactus, and everything will be there!
Here are the supplies I’m using for this watercolor cactus project!
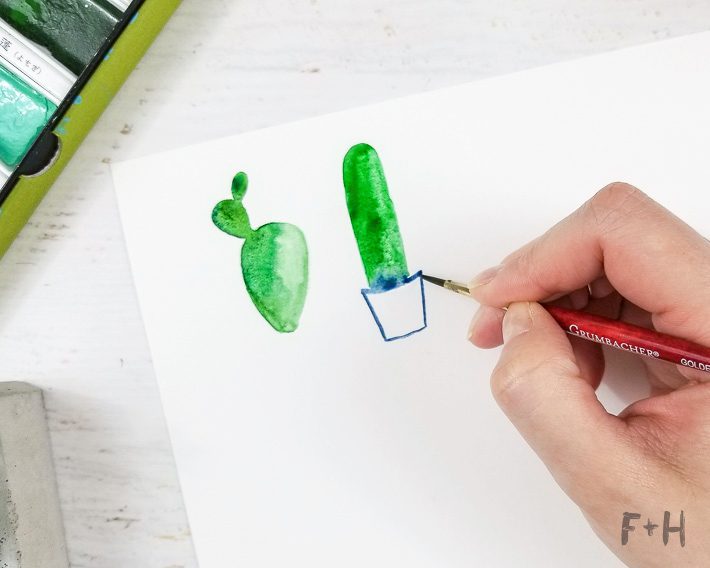
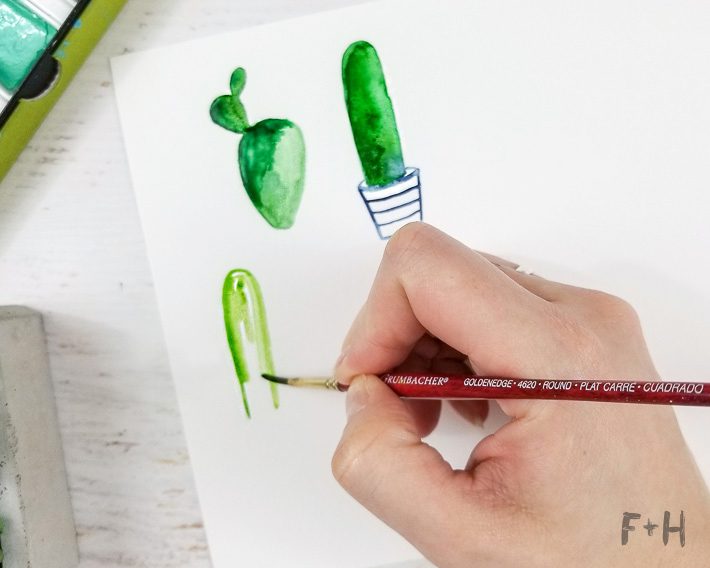
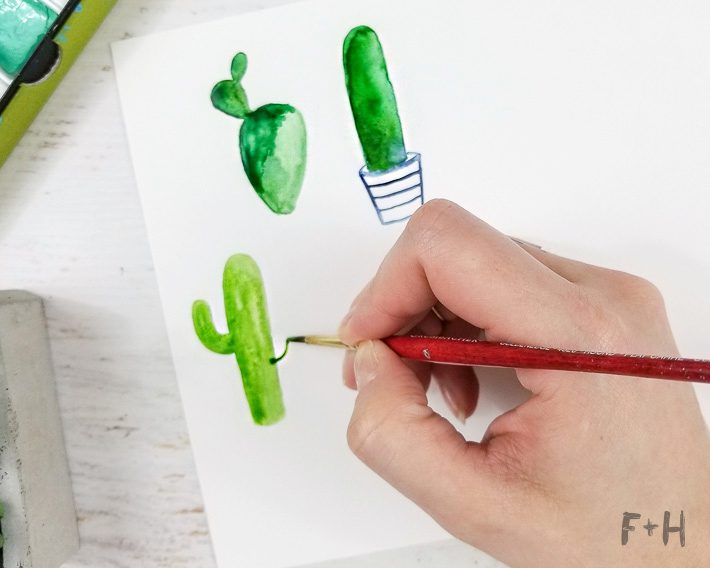
The first watercolor cactus is this fun prickly pear cactus.
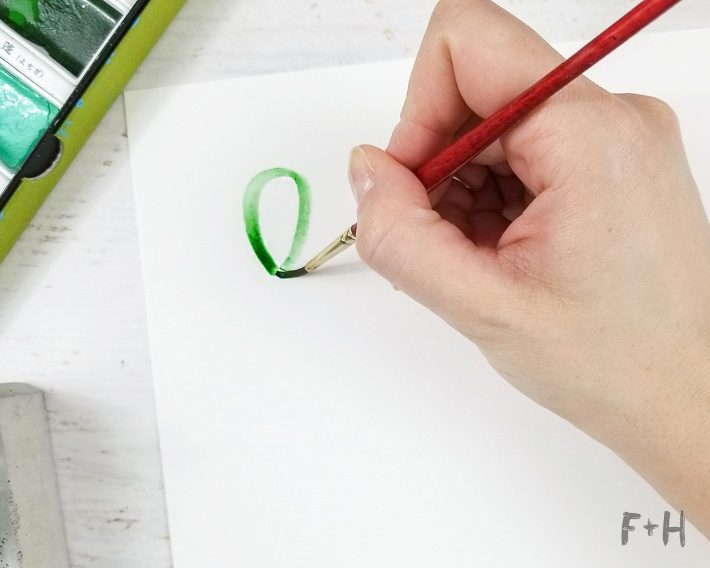
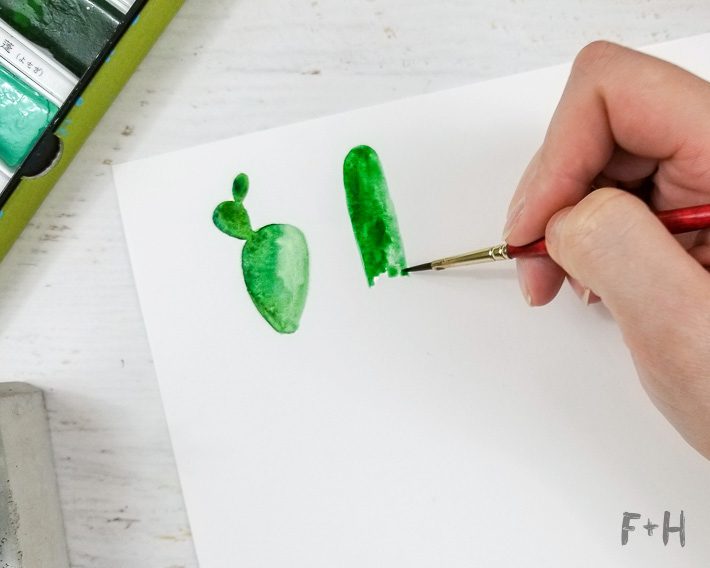
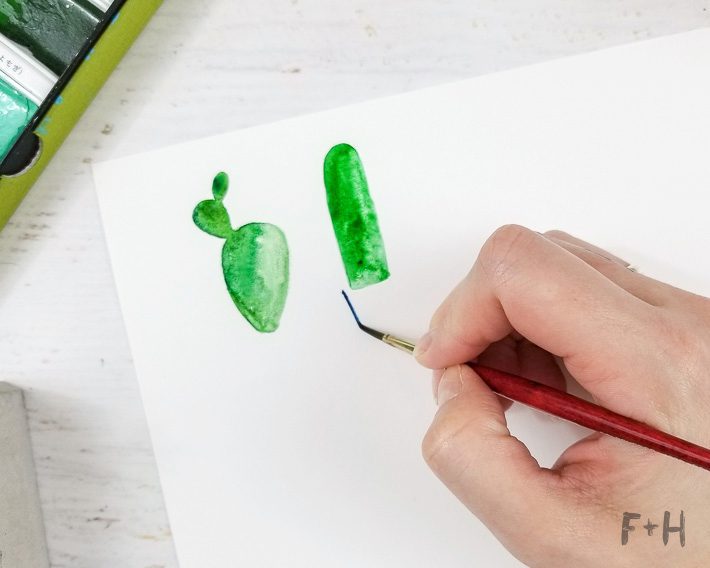
To create the shapes of the cactus you’ll first paint a large popcorn kernel shape. It’s easiest to paint the shape first with a very wet brush, then fill in the shape with more paint while it’s still wet.
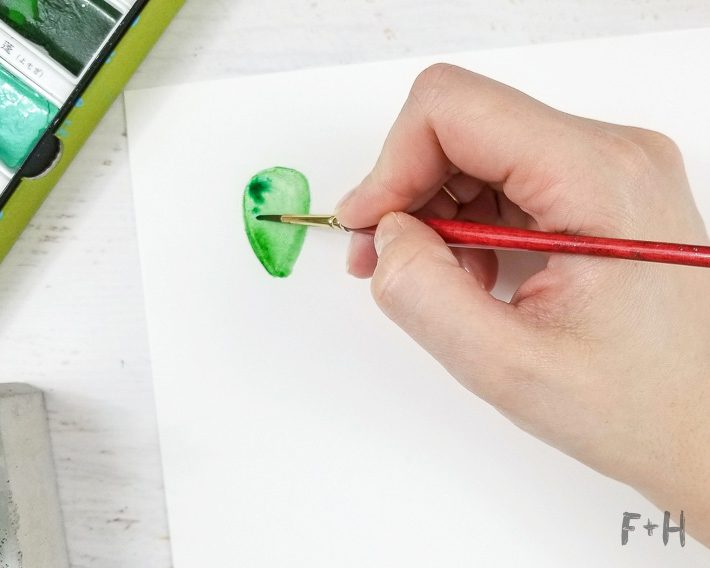
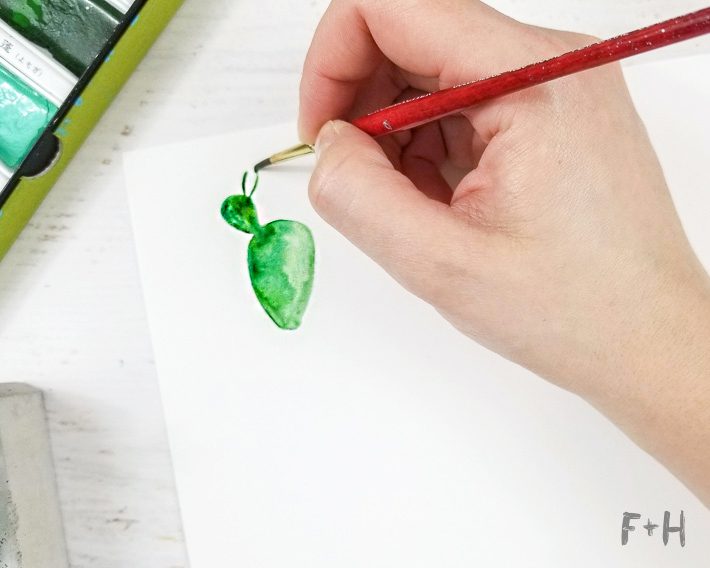
Add a darker shade of green watercolor to one side of the cactus to great some variation and illusion of a shadow. Next, while the paint is still wet, paint another smaller kernel shape on the “corner” of the cactus. Again add some darker paint to the one same side as before to continue the shading. And lastly, add your smallest paddle at the top, but this time on the opposite corner so the cactus has balance. Let this dry completely.
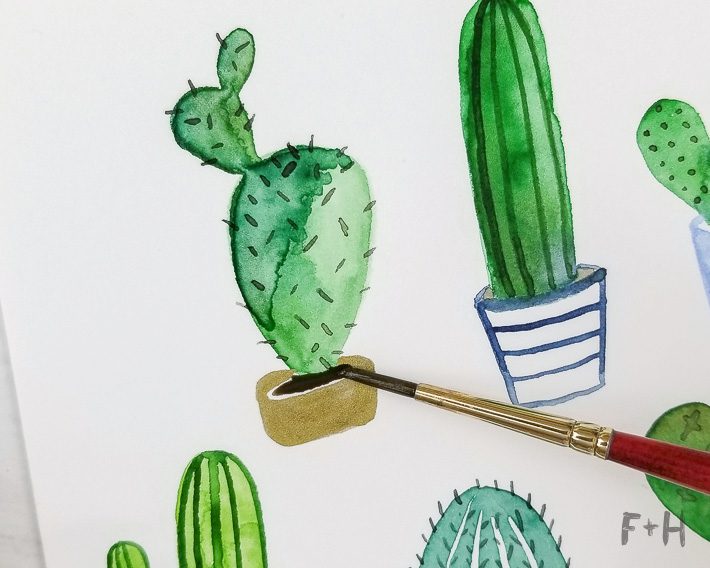
Once the base shape is dry, you can add the prickles to your prickly pear cactus. Using the tip of the brush, mix up a very dark shade of green, rather than black (black can sometimes be too dark and make it look clunky) and add prickles all over in a random pattern. You want a good balance with some spines going off the edge of the shape and also on the paddle.
To paint a pot for your watercolor cactus, start by painting a very flat oval around the base of your cactus to create the rim of the pot. Then paint down to create the pot shape – this can be whatever you want! Lastly, you can add soil to the pot with some dark brown watercolor or leave it white.
You’re done! See?! So easy. On to the next one!
Watercolor Cactus #2
This simple cactus shape is dead easy to paint!
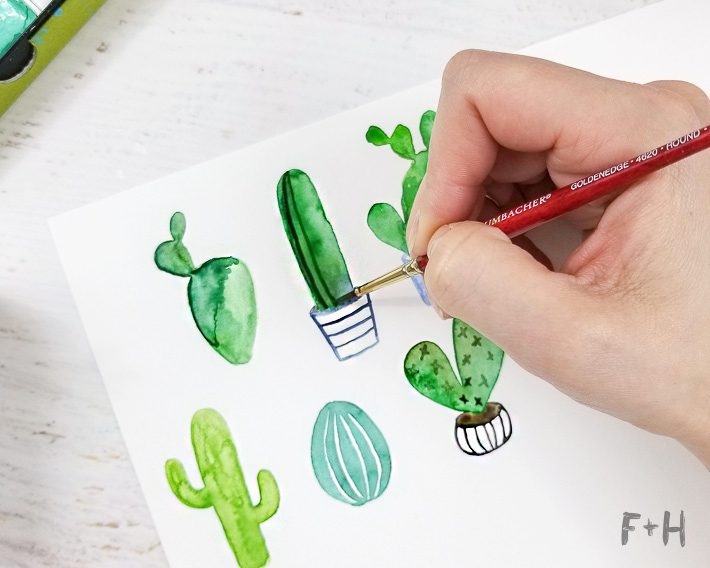
Start with painting a tall shape that is rounded at the top. While it’s still wet, paint in the cactus with more paint. You can use whatever shade of green you’d like for this, but make sure that you use a darker shade to create the variation.
While the cactus is drying, you can paint in the pot. First, paint a curved line under the bottom of your cactus that extends past it just by a bit. This is the edge of the pot. Then paint a line on either side of the cactus to connect the pot around it, making the cactus appear to be inside the pot. Paint two lines down from the ends of the curved line to create the sides of the pot, making sure to narrow the bottom of the pot a bit. Paint the bottom of the pot and add some stripes!
Once the cactus is dry then you can paint in the ribs. Using the same shade of green as the cactus, but with a touch of black to it, paint vertical lines on the cactus following the curve of the shape. You ideally will only want to paint 3-5 ribs on the cactus so it’s not too cramped.
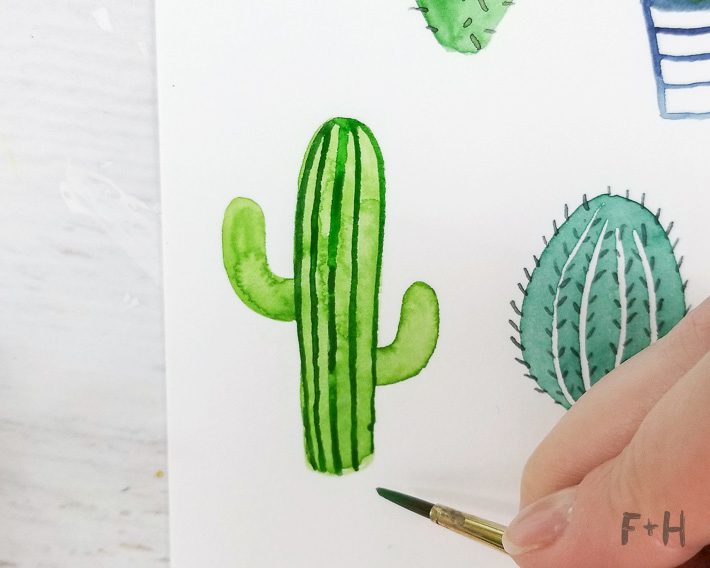
Watercolor Cactus #3
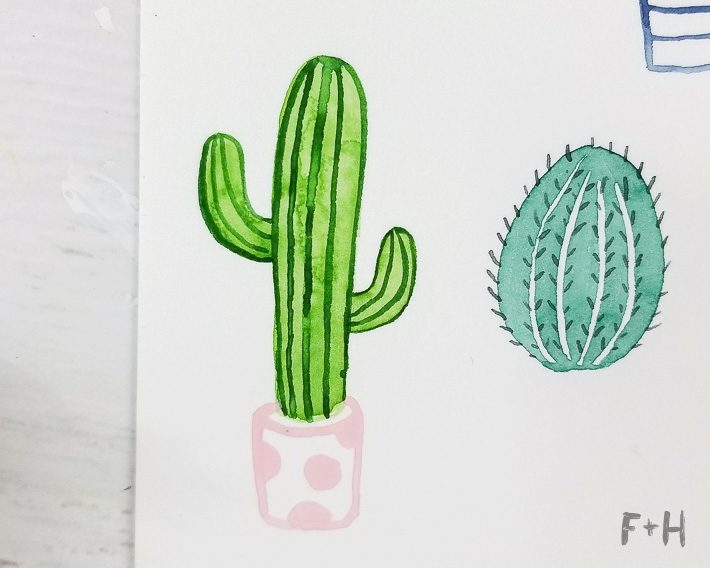
Our third watercolor cactus is a classic Saguaro cactus! These are the cactus shapes we all grew up seeing and learning what cacti looked like.
Using a lighter green shade, paint a tall long shape with a rounded top. While it’s still wet you can fill the shape in with more paint and add some different shade of green to create variety.
While the paint is still wet, add an arm to the left side. Paint a rounded arm shape and make the curve of it almost a complete 90 degrees. Don’t be afraid to make the bends on the “arms” too aggressive – you want them to really seem like they stand out.
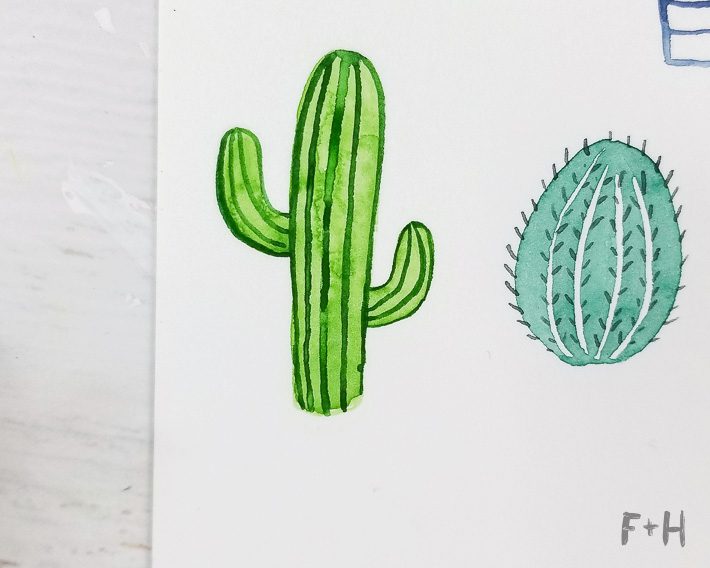
Let the base shape dry completely. Once the cactus is dry use a slightly darker shade of green to paint vertical lines to create ribs. First, paint the entire main body of the cactus and then paint the arms individually. You could also add spines if you want.
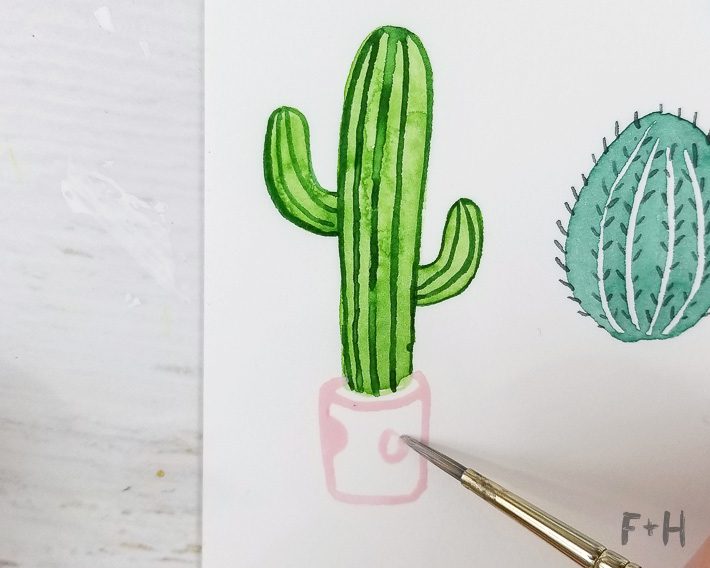
To add the pot, use a very pale shade of pink (I’m using Holbein Shell Pink here) and create a very flat oval around the base of the cactus. Create the outline of the pot, but don’t fill it in with paint. Add some circles around the pot to create a white and pink patterned pot.
Click Next Page below for the rest of the watercolor cacti tutorial!
[…] sharing my tutorial for how to paint a watercolor cactus, I realized that maybe some free cactus clipart would be in order. Sometimes we don’t want to […]
Somehow art seems so much easier when you can see the steps to get to the end. This just goes to show that art and design don’t have to be complicated!
Some links in this post are affiliate links to products I love!
I’m Torrie, the artist + face behind Fox + Hazel! I have a passion for creating beautiful art tutorials, free design goods and encouraging others to pursue their creativity. Here you’ll find free design downloads, art tutorials, process videos and so much more to spark inspiration!


13 Comments
Easy Watercolor Cityscape Step-by-Step Tutorial – My Hub List
September 8, 2021 at 7:30 pm
[…] you’re looking for more watercolor tutorials, then be sure to head over to my blog for this Cactus Watercolor Tutorial or click the image […]
Sabina
February 11, 2021 at 1:49 am
So adorable, could you share more tuorials
Torrie – Fox + Hazel
February 11, 2021 at 8:42 pm
I’m hoping to share more this year! 🙂
Bianca
December 18, 2020 at 10:22 pm
There aren’t any images in this tutorial that I can see….are there supposed to be?
Free Cactus Clipart – Watercolor Cacti | Fox + Hazel
February 19, 2020 at 8:59 pm
[…] sharing my tutorial for how to paint a watercolor cactus, I realized that maybe some free cactus clipart would be in order. Sometimes we don’t want to […]
Mercedes
June 13, 2018 at 11:10 am
Somehow art seems so much easier when you can see the steps to get to the end. This just goes to show that art and design don’t have to be complicated!
torrielynn
June 13, 2018 at 10:01 pm
Totally! I love showing people how easy art really can be. I’m glad this tutorial is an example of that!
semi
May 29, 2018 at 1:24 am
Thank you very much for the tutorial. I`ll try it:)
carolina
May 13, 2018 at 11:09 am
Thank you very much for your tutorials!!
Claire
May 2, 2018 at 4:34 am
I love cactus and these are really sweet. Thanks for the tutorial.
torrielynn
May 2, 2018 at 8:57 pm
Awesome – I hope yours turn out amazing!
Johanna
May 1, 2018 at 1:11 pm
These are so adorable!! Thank you so much for sharing your amazing tutorials! 🙂
torrielynn
May 1, 2018 at 2:24 pm
Thanks Johanna – so glad you like it!