
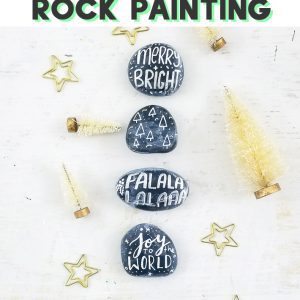
Hand Lettered Christmas Rock Painting
Some links in this post are affiliate links to products I love!
 I am in full on Christmas crafting mode around here. Most holidays I don’t really decorate for (I’ve probably mentioned this a million times by now, ha) but Christmas is my holy grail. We love to go all out at my house and get as much holiday decorating in as we can. A few years ago I created these chalkboard style Christmas painted rocks. They were originally for my craft table in a few shows. They didn’t sell (like a lot of my stuff) but I was secretly glad because now I use them for decorating my own house! I love making them and they require just a few supplies and all ages can make them! A Christmas rock painting could also be adapted as place settings for your holiday table too.
Supplies needed for Hand Lettered Christmas Rock Painting:
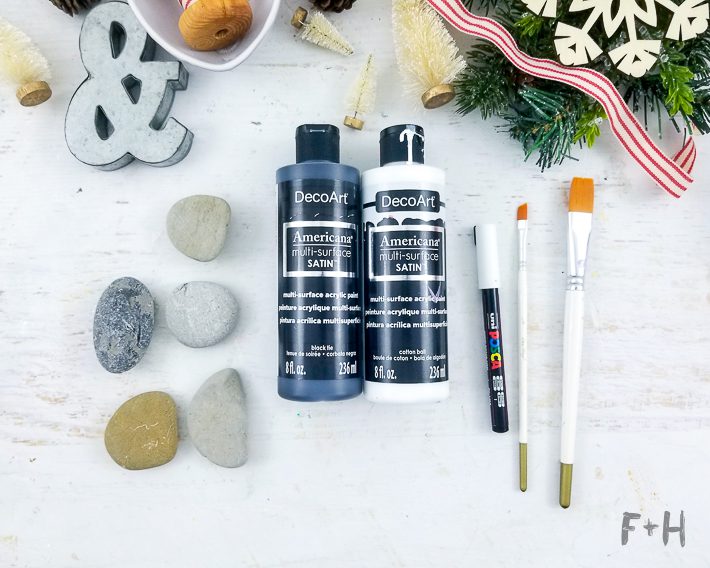
- smooth flat rocks in various sizes (I literally took mine from my front yard.)
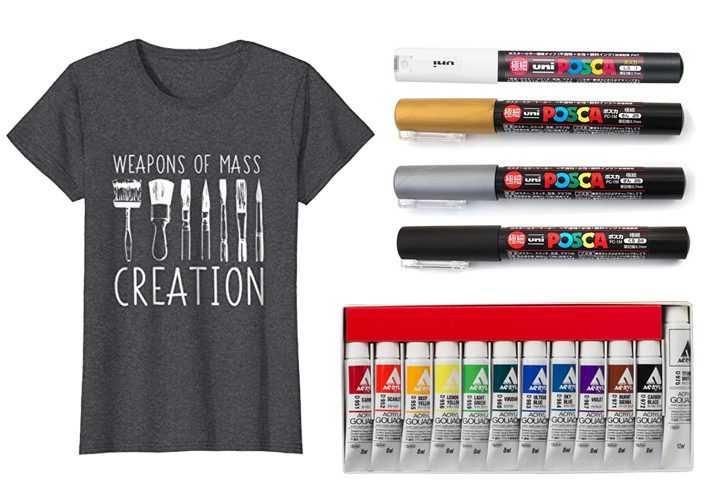
- DecoArt Americana Multi-Surface in Black Tie
- DecoArt Americana Multi-Surface in Cottonball
- Heat tool for drying
- Posca Paint Marker Extra Fine Tip (0.7mm) in White
- Pentel Pen Touch Extra Fine Tip in Silver (not pictured)
- DecoArt Americana DuraClear Varnish, Ultra Matte (not pictured)
- Large and small flat paintbrushes
Step One:
Not pictured here, but before you paint your rocks be sure to wash the rocks first. I forgot to snap a photo of this step, but it is important! Ensure there is no dirt on the rocks and let them dry thoroughly before painting. Any remaining water inside the porous rocks will prevent the paint from adhering properly.
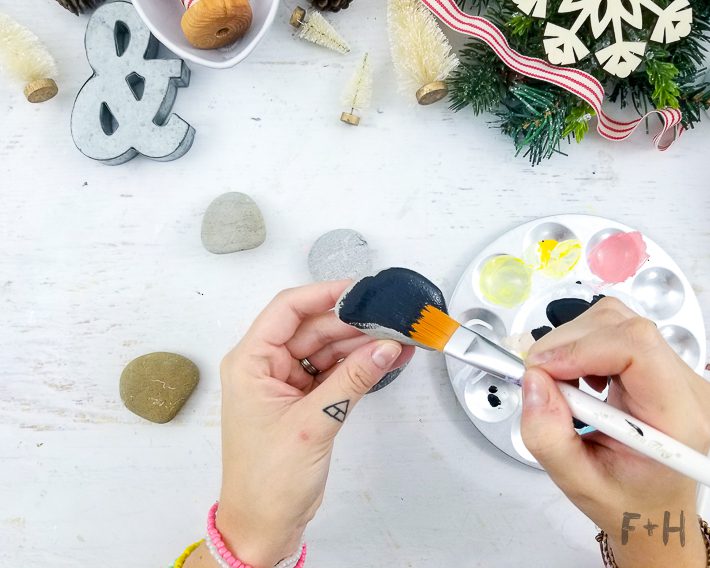
Once your rocks are dry then you can paint a coat of black paint on them. Paint one side first, let the rocks dry and then paint the other side. You can also use a heat gun to speed up the drying time. Apply a second coat to get that black nice and dark. Let dry completely before moving on.
Step Two:
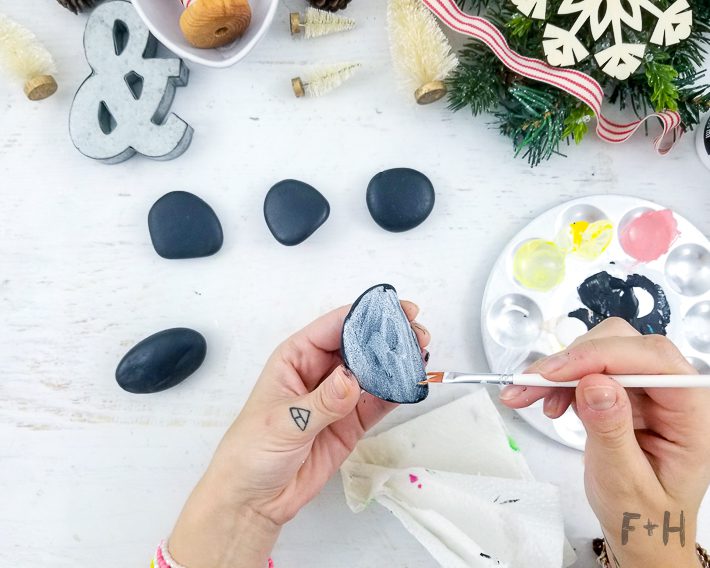
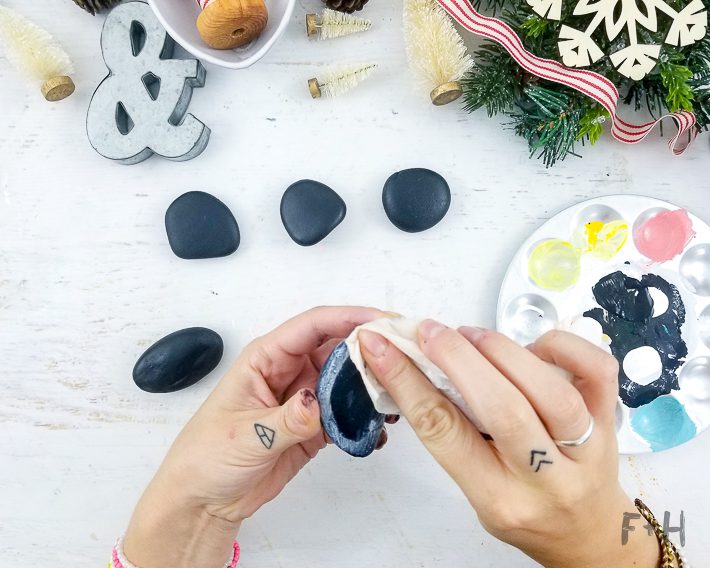
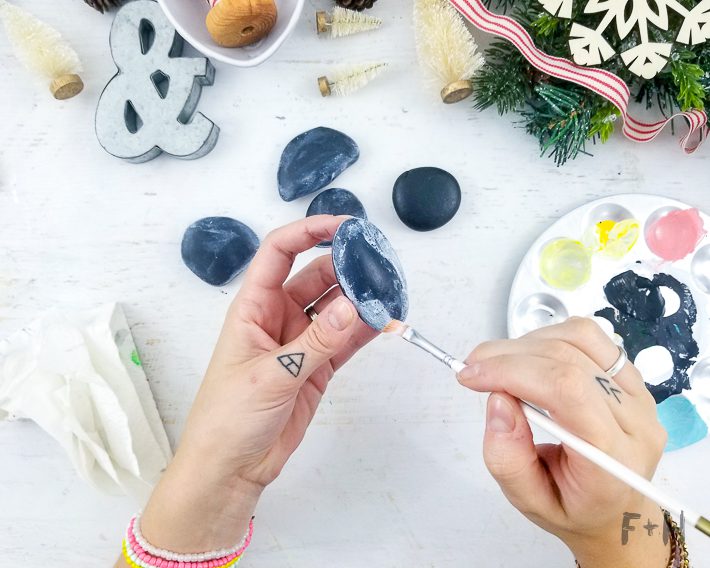
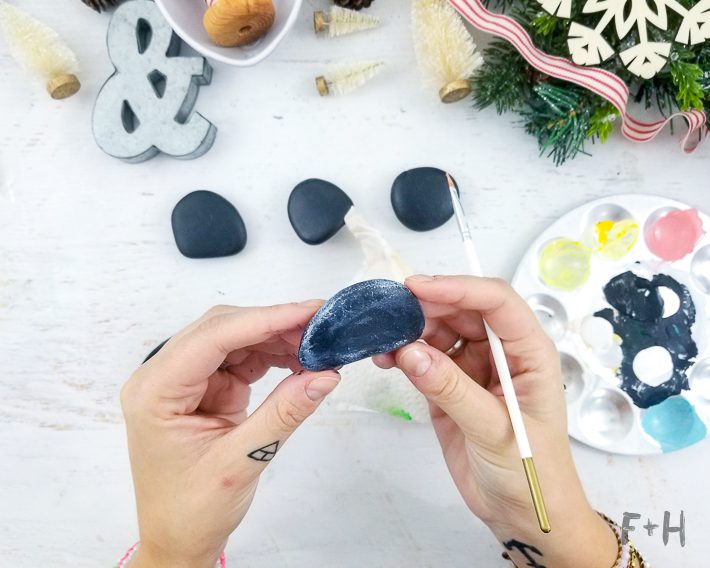
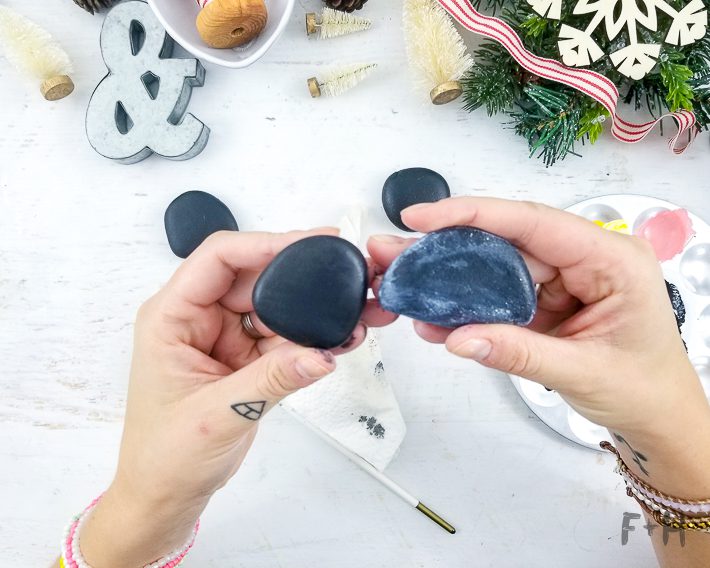
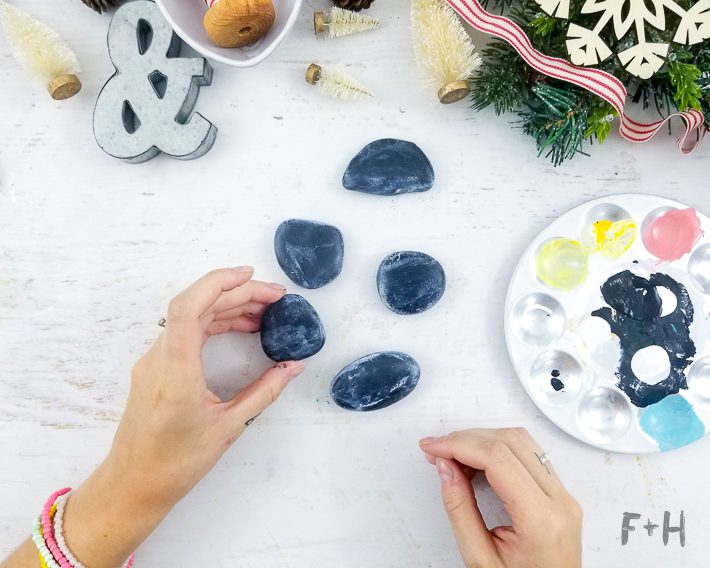
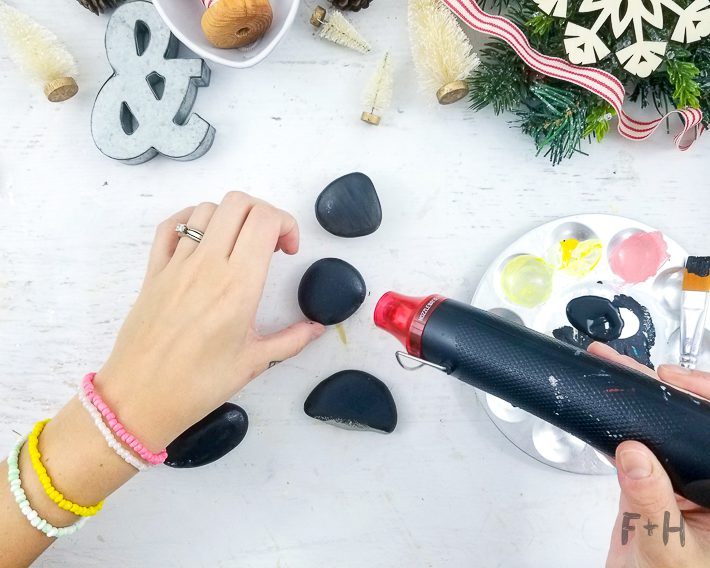
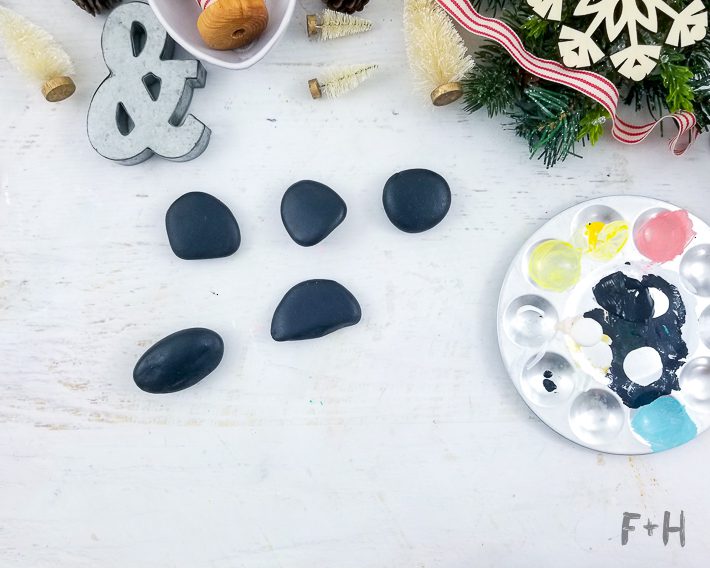
Next you’ll create the seasoned chalkboard texture on the Christmas rock painting. Take a bit of white acrylic paint and add some water to thin it out. Using the smaller paintbrush paint across the rock in a thin layer. Allow to dry for 5-10 seconds and then gently wipe away the white paint with a paper towel. You should wipe away more in the center of the rock and leave more paint around the edges. This helps create an age chalkboard look. Repeat this as many times as you need to get the look you like! As you can see in the last photo, this step really helps add the chalk texture to the rock! Allow the rocks to dry completely or dry with a heat tool.
Step Three:
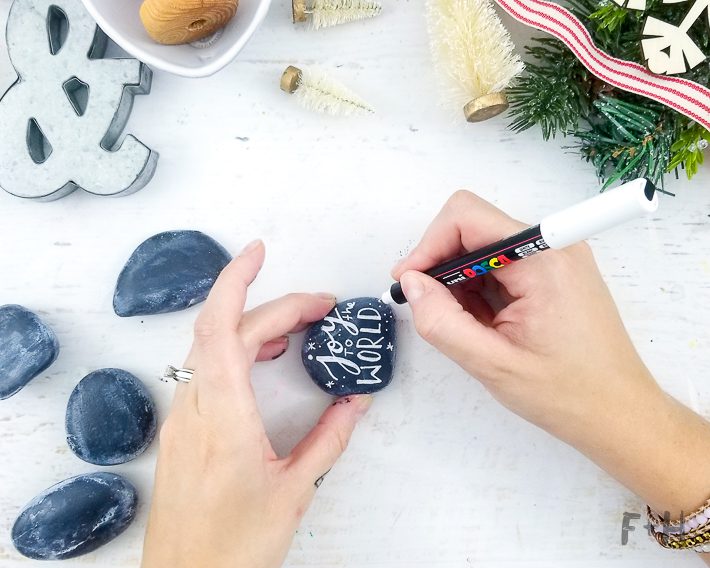
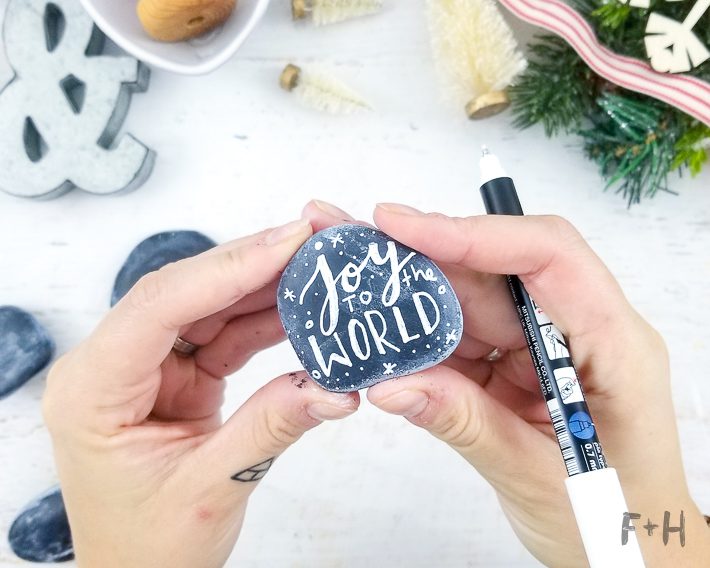
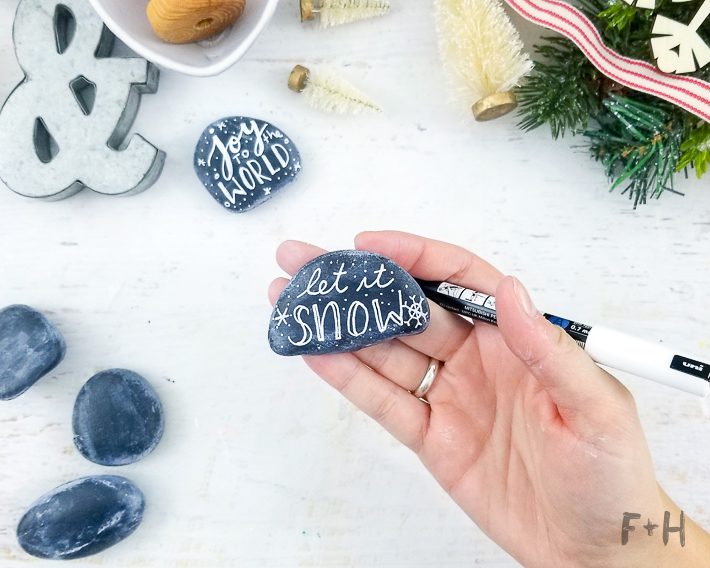
Finally, we can add the hand lettering! I found the best way to do this is with a paint pen, but you could also use a very fine paintbrush too. This part is pretty self-explanatory – write your favourite holiday sayings on the rocks! Or as I mentioned before, you could also write names and use them as a gift tag or place card at the holiday dinner table! You can also choose to seal your rocks with a matter varnish if you’d like. This will help the paint from rubbing off over the years.
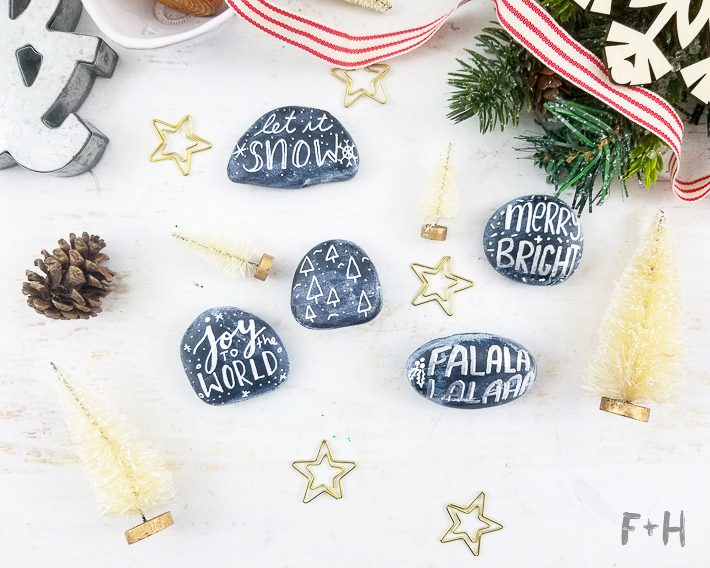
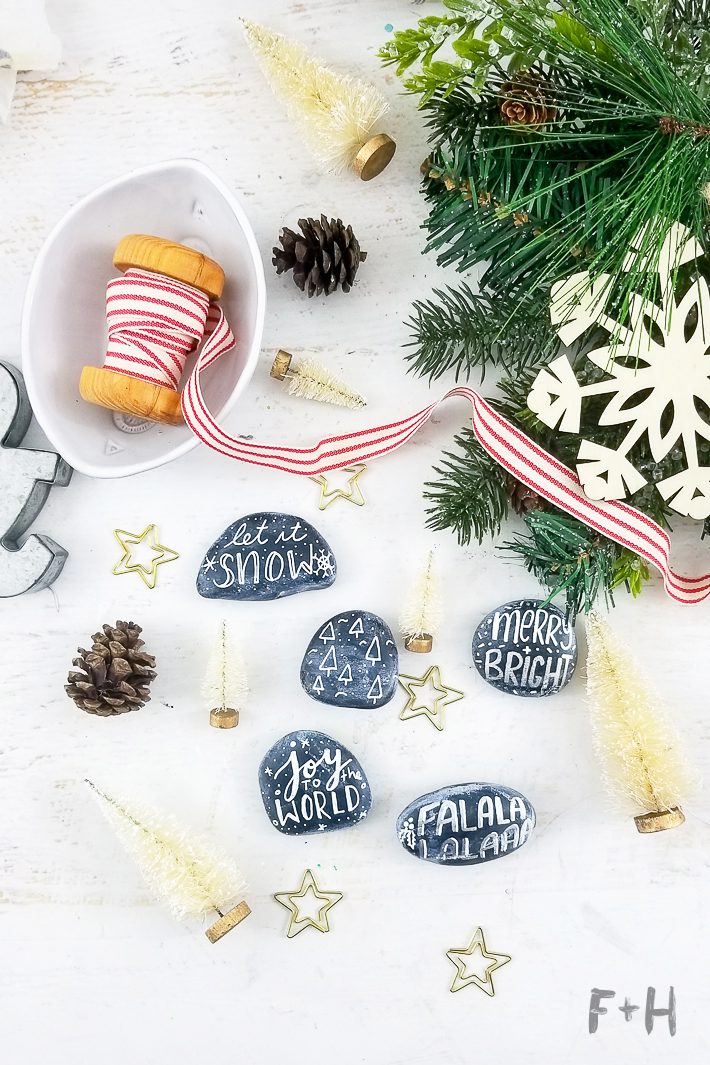
That’s it – your Christmas rock paintings are done! So simple and cute, right? This is one of those projects that has a meditative effect because it’s so simple. If you make a Christmas rock painting or two, please share them with me!
If you love this post, you can spread the love in one of these ways!

6 Comments
25 Budget-Friendly DIY Holiday Porch Decor Tips – HOMY BUDY
February 11, 2026 at 11:40 pm
[…] Save Source: Fox + Hazel […]
Carnelian Stone
March 23, 2023 at 1:20 am
What a fun and creative idea for Christmas rock painting! I love how you used hand lettering to write festive words on the rocks. They look so cute and cozy. Thank you for sharing this easy and budget-friendly tutorial with us. I can’t wait to try it myself and make some beautiful decorations for my home.😊
DIY Watercolor Christmas Tree Gift Tags | Page Flutter
February 17, 2022 at 11:50 am
[…] The last step is to address your watercolor Christmas tree gift tag, punch a hole and attach it to your gift! Easy as pie and so fun to make. I hope you enjoyed this watercolor tutorial! If you’re looking for more Christmas projects, be sure to check out my other watercolor Christmas gift tags and these adorable chalkboard-style painted rocks! […]
14 Most Adorable Painted Rocks Ideas and Crafts For Kids & Adults
December 1, 2020 at 2:41 pm
[…] and White Hand Lettered Rocks idea from Fox and […]
11+ Christmas Painted Rocks DIYs with Ideas | Guide Patterns
June 14, 2020 at 3:05 am
[…] 1. Hand Lettered Christmas Rock Painting DIY […]
Bekah
November 14, 2018 at 9:10 am
This is such a cute idea, and would make the perfect afternoon craft for our residents at The Junction!